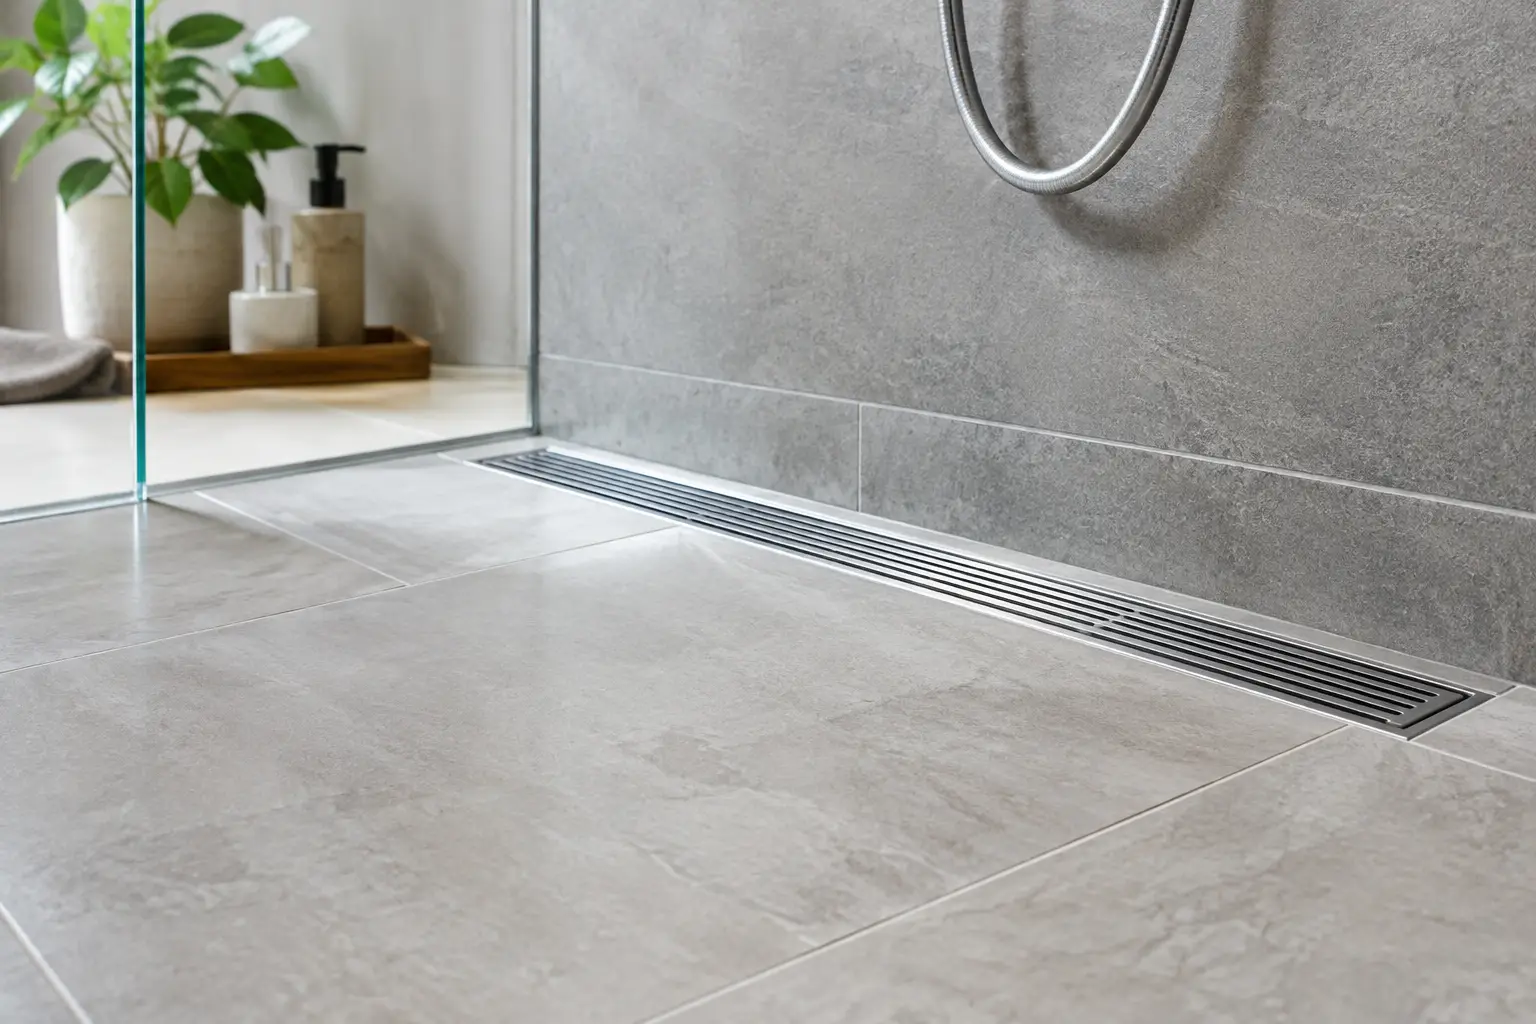
A shower can look well finished and still cause expensive problems if water does not move quickly and reliably to the drain. This guide to shower drainage explains the decisions that need to be made before tiles are selected or walls are closed up. For homeowners planning a bathroom renovation, drainage is not a cosmetic detail. It affects waterproofing, floor levels, shower comfort, cleaning and the long-term protection of the room below and around it.
Why shower drainage must be planned early
A shower drain works as part of a complete wet-area system. The floor needs enough fall to direct water to the waste, the waste needs suitable capacity and placement, and the waterproofing membrane must be correctly detailed around every penetration. Tiles and grout sit over that system. They are not the waterproof barrier.
Leaving drainage decisions until late in a renovation often creates compromises. The floor may need to be raised to create enough fall, the drain may end up in an awkward position, or the proposed tile size may not suit the floor geometry. These issues are especially common when converting an older enclosed shower into a walk-in shower.
The best time to settle the drainage layout is during the design and strip-out stage, when the existing plumbing, slab or timber floor structure, and available floor depth can be properly assessed.
Start with the shower style and layout
The right drainage arrangement depends on how the shower will be used. A compact shower with a framed screen has different needs from an open walk-in shower used by a busy family. The goal is always the same: contain water, move it to the drain, and avoid relying on a bath mat or excessive squeegeeing to keep the bathroom dry.
An enclosed shower can often manage with a centrally located point drain because the shower base is clearly defined. A walk-in shower may benefit from a linear drain placed along the rear wall, at the entry, or to one side. This can allow the floor to fall in one consistent direction rather than from several angles.
There is no single best layout. A linear drain can give a clean, contemporary look and work well with large-format tiles, but it must be installed accurately. A standard point drain is generally simpler, familiar and cost-effective, yet it may require more cuts in larger tiles and a multi-directional fall.
Drain position controls the floor fall
The location of the drain is one of the first technical decisions. Water needs a continuous fall towards it, without flat spots where water can pool. The required fall needs to be formed in the substrate, not improvised with a thick layer of adhesive during tiling.
For a point drain in the centre of the shower, the floor falls from all sides. This suits smaller tiles or mosaics because they can follow the changes in direction more neatly. Large tiles can be used, but the cuts and joins need careful planning to avoid uneven edges or lipping.
For a linear drain against a wall, the floor can generally fall in one plane. This often suits larger tiles and creates a tidy finish, but the wall connection and waterproofing detail need to be precise. The installer must also make sure the drain channel is level so water does not collect at one end.
The practical guide to shower drainage components
A reliable shower drainage system is more than the visible grate. Behind it are several parts that need to work together:
- The waste pipe carries water away from the shower and must be correctly sized, connected and supported.
- The drain body and grate collect water while allowing access for regular cleaning.
- The floor screed or formed substrate creates the correct fall to the waste.
- The waterproofing membrane protects the structure and is properly integrated with the drainage flange.
- The tiles, adhesive, grout and sealant provide the finished surface and help manage daily moisture.
The connection between the membrane and drain is particularly important. If this detail fails, water can bypass the drain assembly and enter the floor system or surrounding walls. That can lead to loose tiles, swollen timber, staining, mould and repair work that goes well beyond replacing a grate.
A qualified renovation team coordinates the plumber, waterproofer and tiler so these stages are not treated as separate jobs. At BP Building & Maintenance, that practical coordination is central to delivering wet areas built for daily use, not just a quick handover photo.
Waterproofing is not optional insurance
Waterproofing is often hidden once a bathroom is complete, which is why it should never be treated as a shortcut area. The shower floor, wall junctions, penetrations and drainage connection all need suitable preparation and application in line with relevant Australian requirements.
Before waterproofing begins, the substrate must be stable, clean and correctly formed. Cracked or poorly prepared surfaces can compromise the membrane. In older homes, a renovation may uncover water damage, movement in the floor, or plumbing that needs updating before any new lining or tiles go on.
A proper process includes allowing materials to cure as required, checking falls before tiling, and protecting the finished membrane from damage by following trades. Fast turnaround matters, but rushing concealed work is a false economy.
Tile choice affects drainage performance
Tile selection should support the drainage design rather than fight it. Large-format porcelain can create a modern, low-joint look, particularly with a linear drain and single-plane fall. However, it is less forgiving where the floor needs to fall to a central point drain.
Smaller tiles and mosaics are often a practical option for shower floors because more grout joints help them conform to the fall. They can also provide useful slip resistance, although the specific tile finish matters more than tile size alone. Very textured tiles may improve grip but can be harder to clean, especially in areas with soap residue and hard water.
The shower floor should not be judged only by how it looks under showroom lighting. Consider barefoot grip, cleaning, the drain placement, and whether the selected tile can be laid without creating standing water at corners or along the shower entry.
Walk-in showers need careful water control
Walk-in showers are popular because they feel open, accessible and easy to maintain. They also require more thought than a shower enclosed by a raised tray and full screen. Without the right fall, screen position and shower-head placement, water can escape into the main bathroom area.
A fixed glass panel can reduce splash while keeping the room visually open. The shower head should be positioned so its main spray is directed away from the entry, and the drain must cope with the expected water flow. In some layouts, a linear drain near the entry provides an extra line of defence. In others, it can create unnecessary complexity.
If accessibility is a priority, a level-entry design may be possible, but the existing structure determines what can be achieved. Concrete slabs, floor joists, waste pipe depth and adjoining room levels all affect the final solution. An on-site assessment is the sensible starting point, not a copied layout from a display home.
Warning signs your existing shower drainage needs attention
Slow draining is the obvious warning sign, but it is not the only one. A blocked grate may be a simple maintenance issue. Repeated slow drainage, gurgling pipes or water backing up can indicate a deeper plumbing problem that should be investigated before a renovation proceeds.
Look for water sitting on the shower floor long after use, cracked grout around the drain, soft or drummy tiles, musty odours, peeling paint outside the shower, or swelling in adjacent cabinetry. These signs do not automatically confirm waterproofing failure, but they justify a professional inspection.
Cleaning the drain regularly also matters. Hair, soap build-up and debris reduce flow over time. Choose a drain grate that can be lifted easily for cleaning, especially in a household with long hair, pets or frequent shower use.
What to confirm before work starts
Before approving a bathroom renovation, ask how the shower fall will be created, where the waste will run, and how the waterproofing will connect to the drain. Confirm whether the proposed tile suits the floor design and whether any structural or plumbing changes are likely once the old bathroom is removed.
A clear scope should also identify the shower screen arrangement, niche locations, fixture positions and finished floor levels. These details are connected. Moving a drain or changing to a larger tile late in the job can affect several trades and add avoidable cost.
Good shower drainage is quiet workmanship: you should not have to think about it after the renovation is complete. When the layout, plumbing, waterproofing and tiling are planned as one system, the result is a bathroom that drains properly, cleans easily and stays dependable for years.