Category: Bathroom Renovation Advice

  • Melbourne Bathroom Renovation Permits Explained

    Melbourne Bathroom Renovation Permits Explained

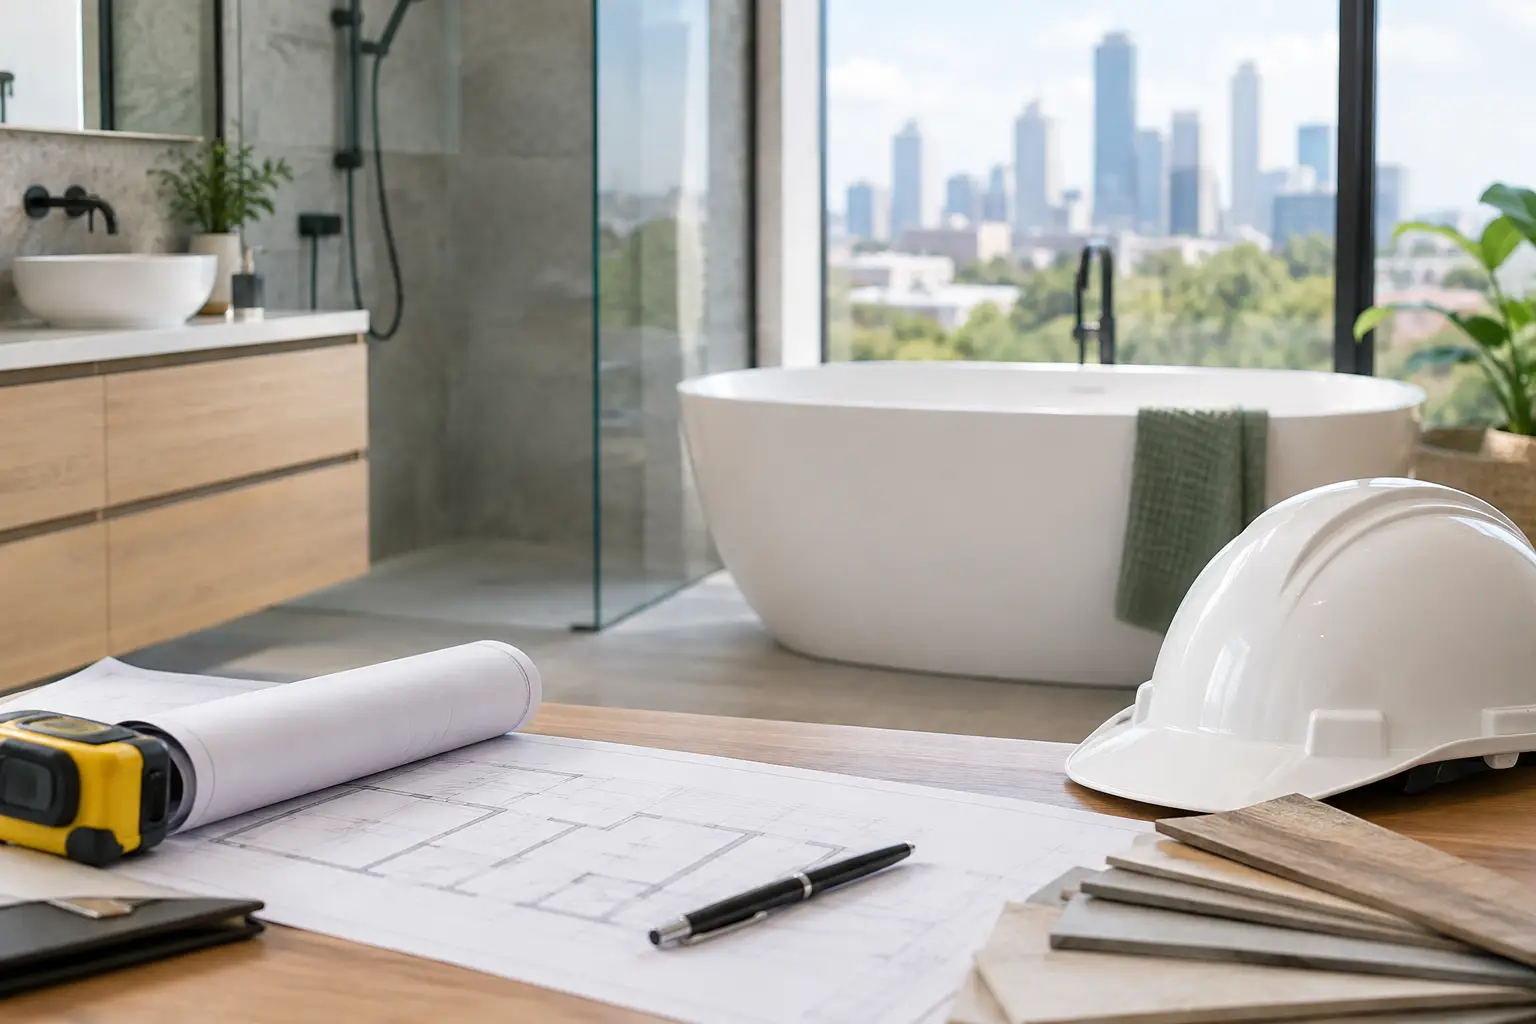
    A bathroom can look like a straightforward internal upgrade until walls come down, plumbing moves and hidden defects appear. Melbourne bathroom renovation permits are not required for every project, but getting the approval question wrong can create delays, extra costs and problems when you sell or insure the property.

    For homeowners in Melbourne’s west, the practical answer is this: check the scope before demolition starts. A like-for-like cosmetic update may have few approval requirements. A full renovation involving structural changes, altered drainage, apartment rules or heritage controls needs closer attention.

    Do you need a permit for a bathroom renovation in Melbourne?

    It depends on the work being carried out, not simply on the fact that it is a bathroom renovation. Many internal bathroom upgrades do not need a building permit where they are non-structural and do not affect the building’s safety, stability or fire protection measures. Replacing tiles, fixtures, a vanity, shower screen and tapware within an existing layout will often fall into this category.

    However, a building permit may be required when the work includes structural alterations. This can include removing or modifying a load-bearing wall, changing a window opening, altering external walls, changing roof framing or affecting required fire separation. A registered building surveyor should assess the proposed work where there is any doubt.

    A planning permit is a separate issue. It is generally less common for an internal bathroom renovation, but it can apply where your property is covered by a planning overlay, such as a heritage overlay, or where the work changes the outside of the building. Planning permits are handled through the relevant local council, while building permits are issued by a registered building surveyor.

    The key point is not to assume that a renovation is permit-free because it is inside the home. The right answer comes from the property, the existing construction and the exact scope of works.

    What work usually needs extra checks?

    The more a renovation changes the building rather than its finishes, the more likely approvals and formal documentation will be involved. Moving a toilet, shower or basin may not automatically trigger a building permit, but it does involve regulated plumbing work. It needs to be designed and completed properly so drainage, water supply and ventilation perform as required.

    Older homes can also change the picture. Once a bathroom is stripped out, it is not unusual to find water-damaged framing, poor previous waterproofing, non-compliant plumbing or walls that have been altered over the years. Repairing damaged timber or correcting a bad past renovation may be necessary before the new bathroom can be built. If structural work is identified, stop and confirm the approval pathway before covering it back up.

    Apartments and townhouses need another layer of consideration. You may need owners corporation approval before works begin, particularly if plumbing connects to common property, waterproofing could affect another lot, or access, noise and rubbish removal affect other residents. In some buildings, there are specific rules for approved trades, work hours, lift protection and insurance certificates.

    Building permits, plumbing compliance and waterproofing are different things

    Homeowners often use the word ‘permit’ to cover every form of compliance. In practice, there are several separate requirements that can apply to one bathroom project.

    A building permit relates to building work that needs formal approval and inspection. It is issued by a registered building surveyor before relevant work starts. If a permit is required, the surveyor will outline the documents, inspections and conditions needed for the job.

    Plumbing work is regulated separately in Victoria. A licensed or registered plumber must carry out the work within their class of registration and provide the required compliance documentation. This is particularly important when fixtures are relocated, new drainage is installed or existing pipework is repaired. Keep all plumbing paperwork with your renovation records.

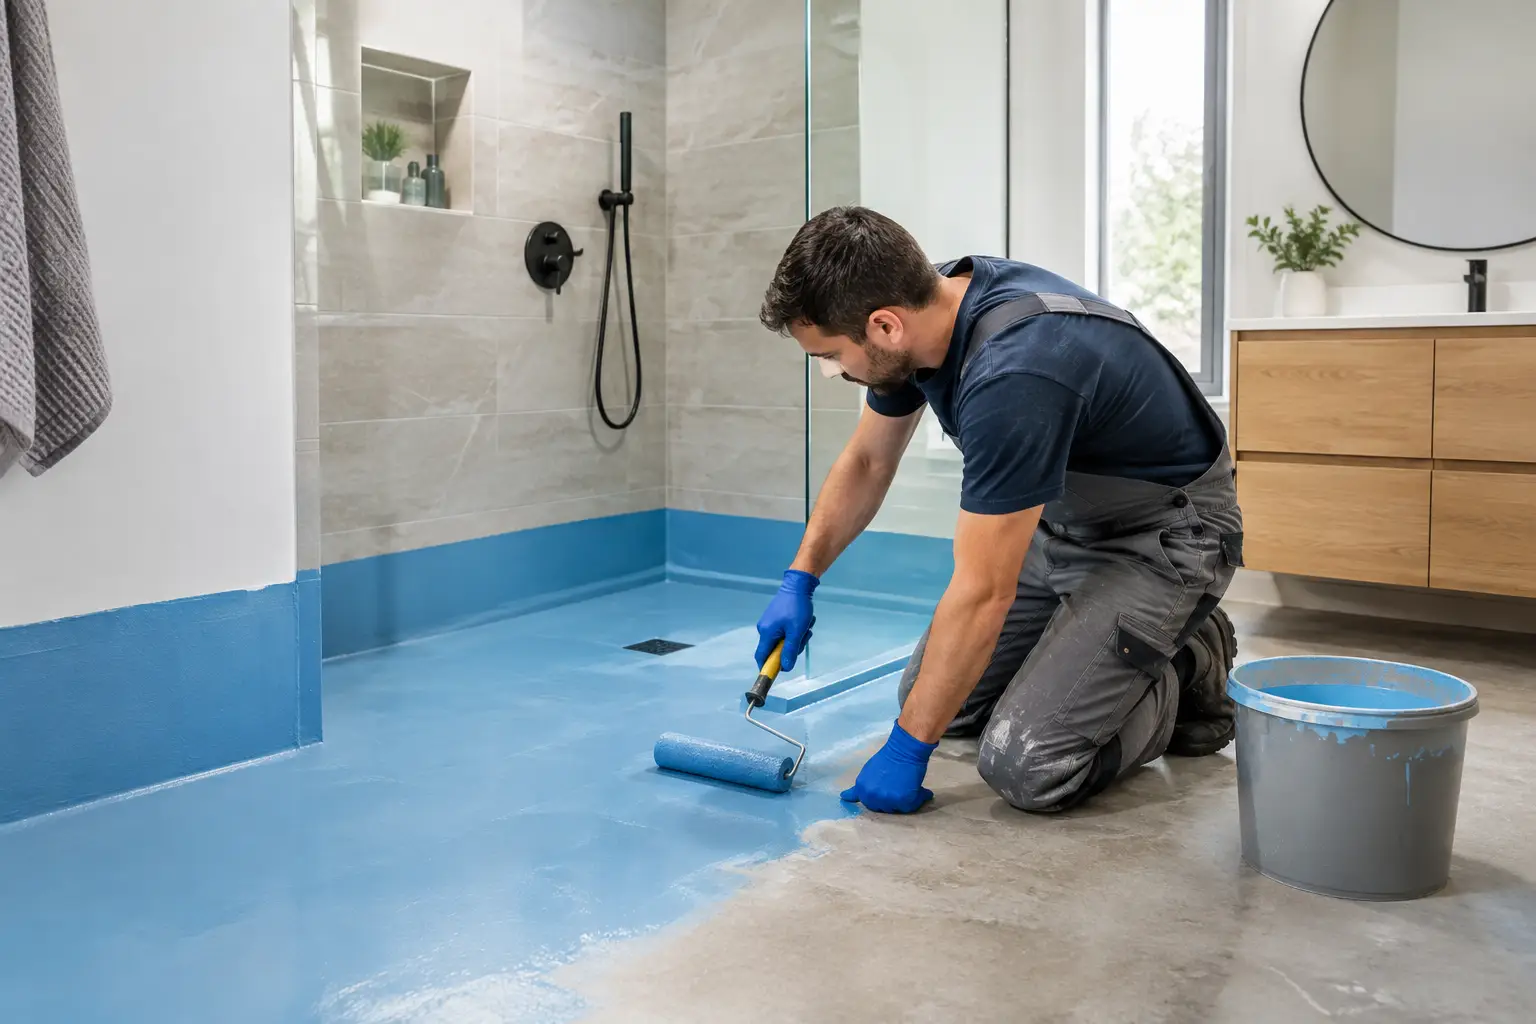
    Waterproofing is equally critical, even where no building permit is needed. Bathrooms are wet areas, and the waterproofing system must be installed correctly before tiling begins. A neat tile finish cannot compensate for a failed membrane underneath. Good renovation practice includes proper substrate preparation, suitable waterproofing to wet-area junctions and penetrations, and clear records of what has been installed.

    At BP Building & Maintenance, this is why bathroom work is planned around qualified trade stages rather than rushed as a cosmetic makeover. Waterproofing, plumbing and structural details need to be right before fixtures and finishes go in.

    When to speak with a building surveyor or council

    You do not need to contact every authority for every tapware replacement. But it is worth getting advice early when your renovation includes any of the following:

    • removing walls or changing wall openings
    • repairing or altering structural framing
    • changes to external walls, windows or the roof
    • work in a heritage-listed or specially overlaid area
    • a bathroom in an apartment, unit or townhouse with owners corporation requirements
    • substantial plumbing relocation, particularly where drainage needs to be reworked.

    A quick check before work begins is far easier than trying to resolve an approval issue after demolition. If a building permit is needed, allow time for plans, documentation and the building surveyor’s assessment. Do not book demolition on the assumption that approval will be immediate.

    For planning questions, contact the local council covering the property. For building permit advice, speak with a registered building surveyor. Your renovation contractor can help identify likely issues and coordinate the work, but the permit decision itself should be confirmed through the proper channel.

    Documents worth keeping after the renovation

    A well-finished bathroom should also have a clear paper trail. This protects you if a question arises later and gives future buyers confidence that the work was handled professionally.

    Keep your written quote and scope of works, invoices, product warranties, plumbing compliance certificate where required, permit documents and inspection records if applicable. It is also sensible to retain photographs of the work before tiles are laid, particularly the waterproofing and plumbing rough-in stages.

    These records matter when you sell, make an insurance claim or need maintenance years down the track. They can also be valuable if a future trade needs to locate pipework or understand how the bathroom was constructed.

    Common mistakes that cause avoidable trouble

    The first is treating waterproofing as a minor line item. It is one of the most important parts of the bathroom and one of the hardest to inspect once tiling is complete. Saving money here can lead to leaks, damaged framing, mould and a far more expensive rebuild.

    The second is moving fixtures without allowing for the full plumbing scope. Shifting a toilet or shower can affect drainage falls, pipe locations and access below the floor. Sometimes a layout that looks simple on paper is not practical without major additional work. A site inspection helps establish what can be achieved before finalising selections.

    The third is starting work in a strata or owners corporation property without written approval. Even where the bathroom is inside your lot, water damage does not respect lot boundaries. Building management may require notice, insurance details and specific protections before trades start.

    Finally, do not rely on verbal assurances that permits are unnecessary. Ask what has been checked, who has confirmed it and what documentation will be provided at completion. Clear answers at the start make for a cleaner, less stressful renovation.

    A quality bathroom renovation is built in the stages you will not see once the room is finished. Before choosing the feature tile or new vanity, confirm the approvals, engage properly qualified trades and make sure the work is documented from strip-out through to final fit-off.
  • How to Choose a Shower Screen for Your Bathroom

    How to Choose a Shower Screen for Your Bathroom

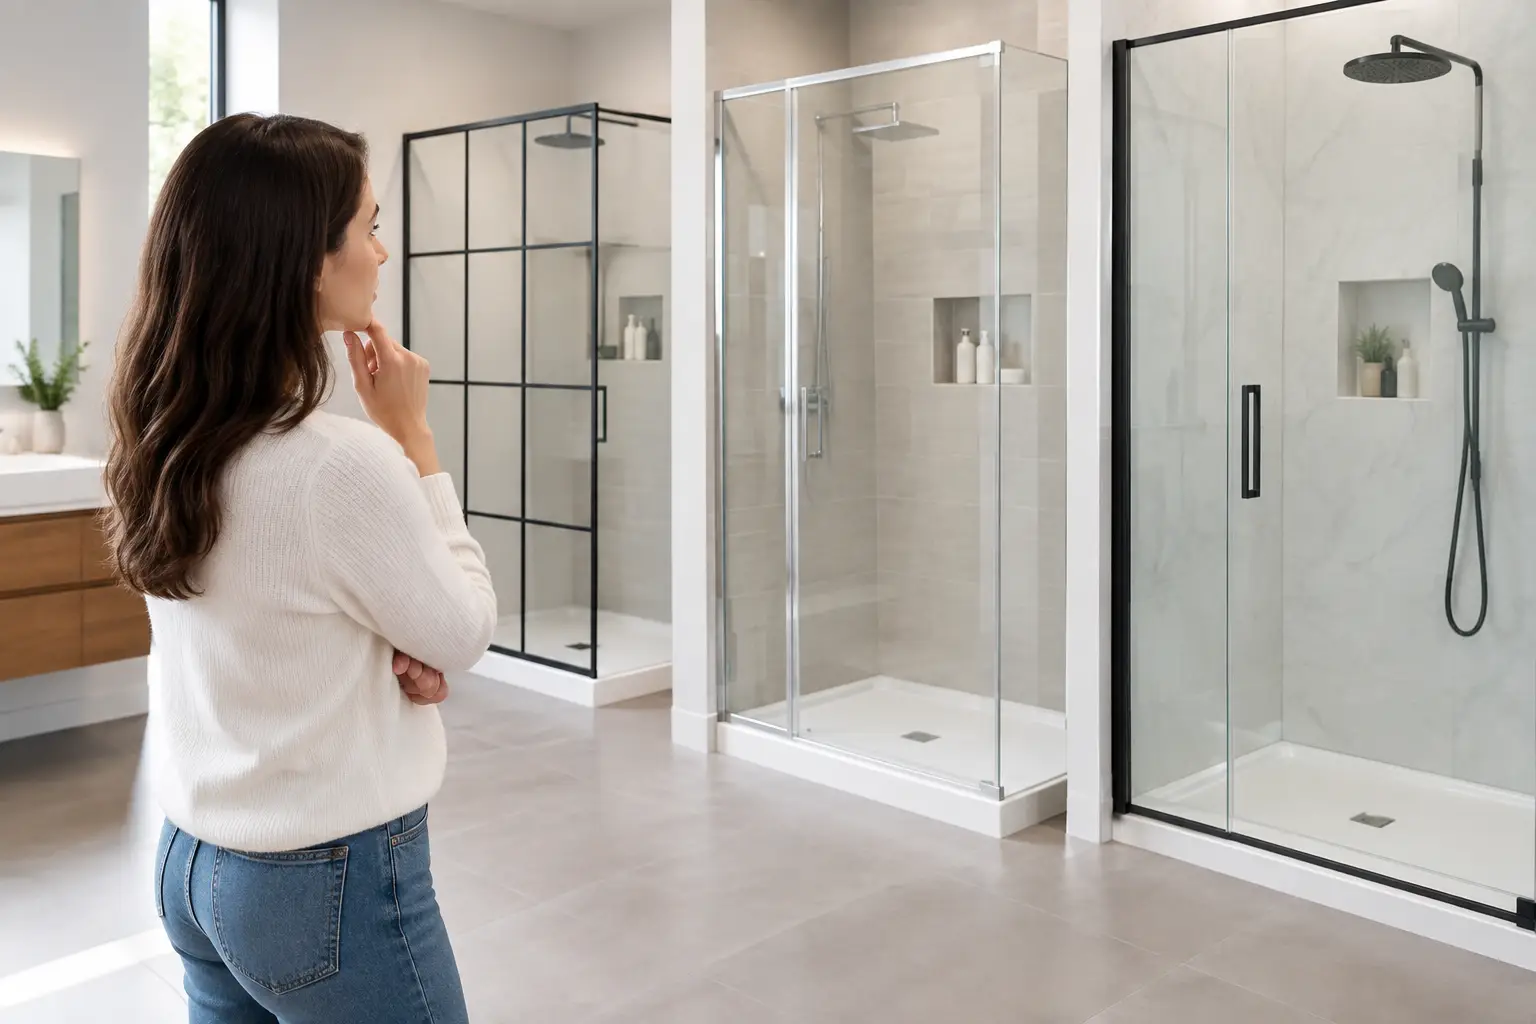
    A shower screen can make a compact bathroom feel open and modern, or make it frustrating to use every morning. Knowing how to choose a shower screen means looking beyond the glass. The right choice needs to suit the room’s layout, the people using it, the drainage design and the level of cleaning you are prepared to do.

    For a full bathroom renovation, the screen should be selected early rather than treated as a final add-on. Its size, fixing points and door swing can affect tile set-out, shower recess dimensions, plumbing positions and even where a vanity can sit comfortably.

    Start with the bathroom layout

    The best shower screen is one that allows people to move through the bathroom without squeezing past a door or stepping around a wet floor. Measure the available shower area, but also consider the clearance around it. A screen that looks right on a plan can be impractical once a toilet, vanity drawers and towel rail are in place.

    In smaller bathrooms, a fixed walk-in panel is often a clean option. There is no door to open, fewer moving parts and less hardware to maintain. However, it needs enough screen length and a well-designed shower area to contain spray. A walk-in layout that is too open can leave water outside the shower zone, particularly when used by children or anyone who prefers a strong shower head.

    A hinged door offers a more enclosed shower and better water containment, but the door needs clear swing space. Sliding doors can work well where there is limited room in front of the shower, although their tracks and rollers require more regular cleaning than a simple fixed panel. Pivot doors are another practical option, provided the opening direction has been properly planned.

    Choose the screen style to suit how you use the room

    Frameless, semi-frameless and fully framed screens each have a place. The best option depends on the budget, style of the renovation and the condition of the surrounding walls.

    Frameless shower screens

    Frameless glass creates a sharp, open finish and is a popular choice for contemporary bathrooms. With minimal visible hardware, it lets feature tiles and quality tapware stand out. It is particularly effective in a walk-in shower where the aim is to make the room feel larger.

    The trade-off is that frameless screens rely on accurate measurements, sound wall fixing and quality installation. Walls must be plumb enough for the glass to align correctly, and the screen should be measured after tiling is complete. Trying to finalise glass sizes too early can lead to unnecessary adjustments or poor gaps around the edges.

    Semi-frameless shower screens

    Semi-frameless designs combine cleaner glass lines with a frame around selected edges. They are generally more forgiving where walls are slightly out of square, and they can offer good water control at a lower price point than fully frameless glass.

    For many family bathrooms, this is a sensible middle ground. You still get a modern result without paying for every last minimal-detail feature.

    Fully framed shower screens

    A fully framed screen is often the most budget-conscious option. The frame provides structure, helps accommodate minor irregularities and can improve water sealing around the perimeter. It may not have the same high-end appearance as frameless glass, but it remains a practical choice for investment properties, secondary bathrooms and renovations where value matters most.

    Select safe glass and reliable hardware

    A shower screen is a safety item as well as a design feature. Bathroom glass should be toughened safety glass and installed in line with relevant Australian requirements. Quality glass, correctly positioned hinges and properly fixed channels are not areas to cut corners.

    Ask what glass thickness is being supplied and how the screen will be secured. Thicker glass can give a more solid feel, especially on larger fixed panels and hinged doors, but heavier glass also places greater demands on the wall structure and hardware. The best specification is not always the thickest one. It is the one suited to the panel size, configuration and fixing conditions.

    Hardware finish matters as well. Chrome is versatile and easy to match, while matte black, brushed nickel and brushed brass can tie the screen into the room’s tapware. Dark finishes can show water spots more readily in hard-water areas, so consider the cleaning routine before choosing purely on appearance.

    Hinges, handles and channels should feel firm and operate smoothly. A door that drops, rubs on the floor or fails to close properly is usually a sign that the installation or hardware quality needs attention.

    Get the size and shower entry right

    When deciding how to choose a shower screen, do not focus only on the overall width. The usable entry opening is just as important. A narrow opening can make the shower awkward for larger adults, older family members or anyone assisting young children.

    Think about who will use the bathroom over the next five to ten years. A spacious walk-in entry can make a bathroom more comfortable as mobility needs change. On the other hand, a completely open entry may not suit a busy family bathroom where water containment is the priority.

    For a door screen, check that the handle will not clash with a vanity, toilet, heated towel rail or other fixture. Allow for practical access to the shower controls too. Ideally, you should be able to turn the shower on without standing directly under cold water, depending on the layout.

    Match the screen to drainage and waterproofing

    A good screen cannot solve poor falls or failed waterproofing. Water needs to drain efficiently towards the floor waste, with the shower area designed to minimise pooling at the screen opening.

    This is especially relevant for walk-in showers and doorless screens. The position of the shower head, screen return, floor gradient and drain all work together. If the shower head sprays directly towards an open edge, even a large panel may not prevent water escaping.

    The waterproofing system must also be completed correctly behind the tiles and at all shower junctions. A screen is fixed over finished surfaces, but the waterproofing underneath is what protects the structure of the home. During a renovation, it makes sense to have the shower design, waterproofing, tiling and screen installation considered as one job rather than handled in isolation.

    Consider cleaning before choosing the finish

    Every shower screen needs cleaning, but some designs make the job easier. Frameless panels have fewer tracks and corners where soap residue can build up. Sliding doors, by comparison, can collect grime around rollers and bottom tracks if they are not maintained.

    A protective glass coating may help reduce water marks, but it is not a replacement for regular cleaning. A quick squeegee after use and a suitable non-abrasive cleaner will help keep glass clear and hardware looking better for longer. Avoid harsh products that can damage protective coatings or dull metal finishes.

    If low maintenance is a priority, a simple fixed panel or hinged frameless door is often easier to live with than a complicated multi-panel configuration.

    Do not measure for glass until the room is ready

    Final shower screen measurements should be taken after wall tiles and floor tiles are installed. Tile thickness, adhesive build-up, wall variation and finished floor levels all affect the final size. This is one reason made-to-measure screens tend to deliver a neater result than trying to make a standard-size unit fit an unfinished opening.

    It is also worth checking what sits behind the wall tiles where hinges or channels will be fixed. Proper backing or suitable fixing locations help ensure the screen is secure without compromising the finished surface. An experienced bathroom renovator will coordinate these details before the walls are closed and tiled.

    Make the decision with the whole renovation in mind

    The right shower screen should support the way the bathroom works, not just finish it off visually. In Caroline Springs and across Melbourne’s western suburbs, BP Building & Maintenance plans shower screens alongside the waterproofing, tiling, plumbing and fit-off work, so the finished bathroom is practical as well as polished.

    Choose a design that gives you enough access, contains water where it needs to, suits your cleaning habits and is installed with care. Those details are what turn a good-looking shower screen into one that still performs properly years after the renovation is complete.

  • 12 Best Space Saving Bathroom Ideas That Work

    12 Best Space Saving Bathroom Ideas That Work

    A cramped bathroom is rarely fixed by simply buying smaller accessories. The best space saving bathroom ideas start with the layout: where people stand, how doors open, where water drains and which fittings earn their footprint. Get those decisions right and even a compact ensuite, family bathroom or powder room can feel calm, useful and properly finished.

    For homes across Melbourne’s western suburbs, this often means replacing an outdated tub-shower combination, a bulky vanity or an awkward door swing with a layout that suits the way the household actually uses the room. The aim is not to squeeze more into every corner. It is to create clear floor space, practical storage and a bathroom that is straightforward to clean and maintain.

    Start with a layout that gives you room to move

    Before choosing tiles, taps or cabinetry, assess the existing plumbing positions and the room’s daily traffic. A bathroom may be small because of its dimensions, but it can also feel small because the toilet, vanity and shower compete for the same standing space.

    Keeping major plumbing near its current location can control renovation costs, particularly in a slab home. Moving a toilet or floor waste may be worthwhile when the current layout is genuinely poor, but it involves more than a cosmetic change. Plumbing falls, waterproofing details and the finished floor level all need to work together. This is where qualified trades matter more than a clever-looking floor plan.

    A good layout also allows enough clearance around the vanity and toilet. You should be able to open drawers, use the basin and step out of the shower without hitting a door or cabinet. In a family home, that practical breathing room will matter long after a fashionable feature tile has lost its appeal.

    Best space saving bathroom ideas for fixtures

    1. Choose a walk-in shower over a bulky enclosure

    A walk-in shower with a fixed glass panel removes the visual interruption of framed screens, sliding tracks and deep shower bases. Running the same floor tile into the shower can make the room read as one continuous space.

    This option depends on correct falls to the drain and reliable waterproofing. A poorly detailed walk-in shower can allow water to escape into the rest of the room, so it is not a place to cut corners. A properly constructed shower zone gives a cleaner look without compromising day-to-day performance.

    2. Use a wall-hung vanity

    A floating vanity exposes more floor, which makes a compact bathroom feel wider and makes cleaning easier. It also allows the vanity height to be tailored to the people using it, rather than accepting the dimensions of a standard floor-standing unit.

    Do not go too shallow if it leaves no usable basin or bench area. In many small bathrooms, a narrower wall-hung vanity with drawers is more useful than a tiny cupboard vanity. Drawers bring toiletries forward instead of leaving them lost at the back of a cabinet.

    3. Select a recessed shaving cabinet

    A mirror cabinet provides storage at eye level without projecting as far into the room as a surface-mounted unit. Recessing it into the wall can save valuable centimetres, particularly above a narrow vanity.

    The wall cavity needs to be checked first. Studs, pipes and electrical wiring can limit where a cabinet can be recessed. Where recessing is not possible, a slim surface-mounted cabinet may still be a sensible compromise.

    4. Consider a compact wall-faced toilet

    A wall-faced toilet has a cleaner profile than older pan designs and reduces hard-to-reach gaps around the base. In tight rooms, choosing a model with a shorter projection can improve circulation without making the toilet uncomfortable to use.

    In-wall cisterns can create a streamlined finish, but they need an access point for future servicing. A quality installation should consider maintenance as well as appearance. Saving space is not a win if a simple repair later requires opening a tiled wall.

    5. Fit a sliding or cavity door where suitable

    A hinged bathroom door can consume a surprising amount of usable floor area. If it clashes with the vanity, toilet or towel rail, a cavity slider or external sliding door may solve the problem.

    Cavity doors are not right for every wall, especially where there is plumbing or structural work behind it. Privacy, acoustic performance and hardware quality should also be considered. A poorly fitted slider that rattles or sticks is not an upgrade.

    6. Move storage into unused vertical space

    Walls are often the most underused part of a small bathroom. A tall, narrow linen cabinet, a shallow shelf above the toilet or a custom joinery tower beside the vanity can hold towels and everyday products without crowding the floor.

    Keep open shelving limited. A few well-styled items may look good, but too many bottles, baskets and spare towels can make a compact room feel messy. Closed storage gives the bathroom a more ordered finish.

    Make storage work harder, not look busier

    The most effective small bathroom storage is planned around what needs to live in the room. Families may need room for toilet rolls, cleaning products, hair tools and several people’s toiletries. A guest powder room may only require hand towels and a small amount of spare paper.

    Start with vanity drawers for daily items, then use a mirrored cabinet for medication and smaller products. Reserve high cabinets for backup supplies and less frequently used items. This prevents the vanity benchtop becoming permanent storage, which is one of the quickest ways to make a bathroom look undersized.

    Built-in niches can also be useful inside a shower. They remove the need for wire caddies hanging from the showerhead and keep bottles off the floor. However, niche placement must be coordinated with the waterproofing system, tile set-out and wall framing. It should be planned before tiling begins, not improvised on site.

    Towel storage deserves the same attention. A heated towel rail can be a practical choice where wall room is limited, while hooks on the back of a door suit children’s towels or occasional use. In a busy family bathroom, one small rail is often not enough. Plan for the number of people using the space.

    Use colour, light and tile set-out to create visual space

    Light-coloured finishes can help a bathroom feel more open, but an all-white room is not the only answer. Soft warm neutrals, pale grey, muted stone tones and natural timber-look cabinetry can all keep the room bright while adding character.

    Large-format tiles usually mean fewer grout lines, which can make walls and floors appear less busy. That said, tile size must suit the room. Very large tiles can lead to awkward cuts in a tiny bathroom, while a smaller format may be necessary on a shower floor to achieve proper drainage falls. Good tile set-out is not just cosmetic. It affects the finished look around drains, niches, corners and doorways.

    A large mirror is one of the simplest ways to increase the sense of depth. Pair it with even task lighting around the vanity rather than relying on a single central light. Dark shadows make a small room feel tighter and make daily grooming less practical.

    Keep the floor as clear as possible

    Floor space is what makes a bathroom feel usable. Wall-hung fittings, a frameless or minimal-frame shower screen and carefully positioned accessories all help retain it. Avoid adding freestanding storage units unless there is truly nowhere else for the items to go.

    Where possible, choose fittings with more than one job. A vanity drawer can include internal organisers. A mirrored cabinet can provide lighting. A shower niche can hold products without a separate caddy. These decisions reduce clutter without turning the room into a showroom.

    Be careful with oversized statement pieces. A freestanding bath can be worthwhile in a larger main bathroom, especially for a household that will use it regularly. In a compact room, though, it can take space away from the shower, vanity storage and circulation. A practical shower and a well-sized vanity will usually add more everyday value.

    Plan the renovation details before work begins

    Small bathrooms are less forgiving than large ones. A 20 mm change in vanity depth, a door opening the wrong way or a floor waste placed without considering tile set-out can have an obvious impact. Detailed measuring and trade coordination before demolition helps avoid expensive alterations once waterproofing and tiling are underway.

    For a full renovation, the work should include correct strip-out, plumbing rough-in, compliant waterproofing, substrate preparation, tiling and final fixture installation. These are connected stages, not separate jobs to organise at random. The quality behind the tiles is what protects the home from water damage and supports a bathroom that lasts.

    BP Building & Maintenance approaches compact bathroom renovations with this practical view: make the space work first, then finish it with durable materials and clean detailing. A site inspection is the best way to identify which changes will genuinely improve the room and which ones will only add cost.

    The right small-bathroom design should make the morning routine easier, not merely make the room photograph well. Choose a layout that clears the floor, storage that contains the clutter and qualified workmanship that protects the space behind the walls. That is how a compact bathroom becomes one of the hardest-working rooms in the home.

  • How to Hire a Bathroom Renovator Confidently

    How to Hire a Bathroom Renovator Confidently

    A bathroom can look impressive on handover day and still hide the problems that cost the most later. Loose tiles, failed waterproofing, poor drainage and rushed plumbing work are rarely obvious at first glance. When you hire a bathroom renovator, you are not simply choosing someone to install tiles and tapware. You are trusting them with the wettest, most technically demanding room in your home.

    For homeowners in Caroline Springs and Melbourne’s western suburbs, the right choice comes down to proven trade capability, a clear scope and a contractor who takes responsibility for the complete job. Cheap quotes can be tempting, but bathroom work is one area where shortcuts often become expensive repairs.

    Hire a Bathroom Renovator With the Right Trades

    A complete bathroom renovation involves several specialised trades working in the correct order. Demolition, plumbing, carpentry, waterproofing, tiling, shower construction, cabinetry and final fit-off all need to come together properly. If one stage is poorly managed, it can affect every stage after it.

    Ask who will complete the key work and whether the renovator has the relevant qualifications in-house or uses trusted, qualified trades. At a minimum, plumbing and waterproofing should never be treated as minor details. A registered plumber can manage pipework, drainage and fixture connections correctly. Certified waterproofing work protects the structure behind the tiles, where water damage can otherwise spread unnoticed.

    A renovator who coordinates the full project also gives you one clear point of contact. That matters when walls are opened up, an existing problem is found or a layout needs adjustment. You should not be left trying to organise a plumber, tiler and waterproofer yourself while the room is out of action.

    Waterproofing Is Not the Place to Save Money

    Tiles are a finish, not a waterproof barrier. The membrane behind them is what protects the floor, walls and adjoining rooms from moisture. A bathroom may need waterproofing to the floor, shower area, wall junctions and other wet zones depending on its design.

    Good waterproofing is careful, methodical work. Surfaces need to be prepared properly, junctions treated correctly and drying times allowed for before tiling starts. Rushing this part of the job to save a day can create a major problem years later.

    When discussing your renovation, ask how waterproofing will be handled and whether the contractor can explain the process in plain language. A professional should be comfortable talking through it. Vague answers, or a focus only on the visible finishes, should raise questions.

    Look Beyond the Bathroom Design

    A good layout should suit the way your household uses the room, not just follow a photo you have saved online. A walk-in shower can make a compact bathroom feel larger and improve access, but it needs the right falls to the drain and enough room to contain water. A floating vanity may create a cleaner look and make floor cleaning easier, but storage requirements still need to be considered.

    Before accepting a proposal, think through the practical details. Where will towels go? Is there enough bench space? Does the door clash with a vanity or toilet? Will the shower screen make the room feel cramped? Can ventilation manage steam effectively?

    These decisions are especially important in family bathrooms, where storage, durable finishes and easy cleaning usually matter more than a trend that dates quickly. A capable renovator can flag issues before demolition starts, when changes are simpler and less costly.

    Compare Quotes Properly

    The lowest number on a quote is not always the lowest project cost. Renovation quotes vary because some include every stage while others leave out demolition, rubbish removal, waterproofing, fixtures, tiling allowances or final connections. An unclear quote can lead to disagreements once work has begun.

    A detailed quote should identify the work being carried out, materials or allowances included, labour, demolition and disposal, and any exclusions or provisional items. It should also make clear whether you are supplying items such as tapware, mirrors, vanity units and tiles.

    Do not expect every unknown to be priced with perfect certainty before walls and floors are opened. Older homes can reveal damaged framing, outdated plumbing or unexpected water damage. The important point is how those findings will be communicated, approved and priced. A reliable contractor will discuss variations before proceeding, rather than adding costs without explanation.

    Questions Worth Asking Before You Commit

    You do not need to become a building expert, but a few direct questions will tell you a lot about how a renovator works:

    • Who manages the project from strip-out through to final fit-off?
    • Which trades will complete the plumbing, waterproofing, carpentry and tiling?
    • What is included in the quote, and what could be an additional cost?
    • How will any hidden issues or changes be approved?
    • What is the expected sequence of work and likely timeframe?
    • How will the home be protected from dust, debris and unnecessary disruption?

    The answers should be specific and practical. A contractor who avoids details before work begins is unlikely to become clearer once the bathroom is stripped out.

    Check Workmanship, Not Just Marketing

    Photos and reviews are useful, but look for signs of consistent workmanship. Check whether tile lines are straight, cuts around fixtures are tidy, niches are well proportioned and shower floors appear to drain correctly. These details show the level of care behind the finished appearance.

    It is also reasonable to ask about previous work similar to yours. A small ensuite, a family bathroom with a separate bath, and an accessible walk-in shower each present different planning and construction requirements. Experience with your type of project reduces the chance of avoidable design mistakes.

    Local experience can make a difference too. A contractor working regularly across Melbourne’s western suburbs understands the common mix of newer estates, established homes and renovation expectations in the area. More importantly, they have a local reputation to protect and are easier to contact if you need support after the job is complete.

    Plan for Disruption, Then Minimise It

    Even a well-run bathroom renovation creates some disruption. There will be noise during demolition, dust during strip-out and periods when the room cannot be used. If it is your only bathroom, discuss this upfront so the schedule and work sequence can be planned around your household.

    Fast turnaround is valuable, but it should not mean skipping essential drying, curing or inspection time. The best result is an efficient project that respects the technical stages of the work. There is a difference between organised and rushed.

    Ask how the site will be kept tidy, where rubbish will be placed and when trades will generally be on site. Clear communication is not an extra service. It is part of professional project management and makes a significant difference when your home is being renovated.

    Choose Accountability Over a Patchwork of Trades

    Hiring separate trades can appear cheaper at first, particularly if you have a contact for plumbing or tiling. However, it also puts you in charge of scheduling, quality control and deciding who is responsible when one task affects another. That approach can work for a very small update, but it carries more risk in a full wet-area renovation.

    For a complete bathroom, a one-stop renovator provides clearer accountability. BP Building & Maintenance manages bathroom renovations from demolition through to waterproofing, plumbing, tiling, custom vanities and final fit-off, with qualified trade capability behind the work. This approach keeps the project moving and ensures the finished bathroom is built as one coordinated system.

    Take the time to choose a renovator who asks sensible questions about your home, explains the scope clearly and treats waterproofing and trade quality as non-negotiable. The best bathroom renovations do more than refresh a room. They give you a durable, functional space you can rely on every day.

  • Bathtub Shower Comparison for Melbourne Homes

    Bathtub Shower Comparison for Melbourne Homes

    A bath can be the feature that makes a family bathroom work harder. A walk-in shower can make the same room feel larger, safer and easier to use every day. The right choice is not about following a trend. This bathtub shower comparison looks at how each option performs in real Melbourne homes, where room size, household needs, waterproofing and resale all matter.

    For many renovations, the best result is not simply choosing a bathtub or a shower. It is choosing a layout that suits the people using the room now, while avoiding expensive compromises behind the tiles.

    Bathtub shower comparison: start with how you use the room

    A bathtub makes practical sense for households with young children. Bathing toddlers is simpler, and a bath can be a comfortable option for adults who enjoy a soak at the end of the day. In a larger main bathroom, it can also give the room a more complete, family-friendly feel.

    A shower is generally the better daily-use option for busy households, older residents and anyone wanting easier access. A properly designed walk-in shower has no high bath edge to step over, provides more standing room and is easier to clean around. This is particularly valuable in an ensuite or a compact bathroom where every millimetre counts.

    The key question is straightforward: will the bath be used often enough to justify the floor area it takes up? A bath that is used weekly by children or regularly by the household is a worthwhile inclusion. A bath installed only because it seems expected can leave you with a cramped shower, limited vanity storage and awkward circulation.

    The combined shower-over-bath option

    A shower-over-bath setup is often selected when there is room for only one wet area. It can provide bathing flexibility without requiring the footprint of a separate shower and bath. For smaller family bathrooms, this may be the most practical way to retain a bath.

    There are trade-offs. Stepping into a bath to shower is less convenient and can become a safety concern as occupants get older. The shower screen, wall junctions and bath edge also need careful detailing. Water that repeatedly reaches poorly sealed areas can cause damage that stays hidden until tiles loosen, plaster swells or mould appears.

    A shower-over-bath works best when it is planned as a proper wet-area installation, not treated as a standard bath with a shower added later. The waterproofing, screen position, shower rail, mixer location and tile falls all need to work together.

    Space and layout often make the decision

    A standard bath may fit into a tight space on paper, but that does not mean the finished bathroom will feel comfortable. You still need room to enter the space, dry off, access the vanity and open storage without colliding with a toilet or screen.

    A walk-in shower can make a narrow bathroom feel more open because there is less visual bulk. A fixed glass panel instead of a fully enclosed cubicle can help maintain sightlines, while a wall-hung vanity can free up more floor space. However, an open shower is not automatically suitable for every room. It needs enough depth and the right screen arrangement to keep spray contained.

    For bathrooms with limited width, an alcove bath with an overhead shower can be more efficient than trying to force in a separate bath and shower. In a larger room, separate zones usually offer the best long-term functionality: a walk-in shower for everyday use and a bath for children, guests or relaxation.

    Before finalising a plan, consider door swings, window locations, existing plumbing points and the position of floor wastes. Moving plumbing may be worthwhile for a better layout, but it affects the scope and cost. A clear site assessment avoids designs that look good on a plan but create problems during construction.

    Safety, access and cleaning

    A walk-in shower usually wins on access. A low-entry or level-entry shower reduces the need to step over a bath wall or raised shower base. That makes it a sensible choice for homeowners planning to stay in their property long term, as well as for households with mobility concerns.

    Safety is not only about entry height. Correct floor falls are critical. Water must drain to the waste without pooling near the shower entrance or travelling into the rest of the bathroom. Tile choice matters too. A polished tile may look sharp, but it is not always the best option in a wet, barefoot area. The appropriate slip resistance should be considered alongside appearance and ease of cleaning.

    Baths are not difficult to maintain, but they do have more edges, ledges and screen hardware than a simple open shower. Freestanding baths can look impressive, yet they require clear space around them for cleaning and may not suit a compact room. Back-to-wall baths often give a similar visual result with a more practical cleaning arrangement.

    For shower screens, fewer moving parts generally mean fewer areas to clean and maintain. Frameless glass can create a clean finish, although it still needs regular wiping to reduce soap residue and hard-water marks. A quality screen installation and sound silicone work will make a noticeable difference over time.

    Waterproofing is the non-negotiable part

    Whether you choose a bath, shower or both, the most important work is behind the finished surface. A bathroom can have premium tiles and fixtures yet still fail early if the waterproofing system, floor preparation or drainage is poor.

    Shower areas receive concentrated water exposure every day. They need correct substrate preparation, membrane application, waterproofing upturns and compliant detailing at corners, penetrations and junctions. The transition between a bath and wall is also a high-risk area. It must be properly sealed and finished so water cannot work its way into the wall cavity.

    Waterproofing should never be treated as a cosmetic line item to reduce the quote. Repairing water damage after a failed renovation can involve removing tiles, sheeting, fixtures and sometimes damaged framing. Getting it right during the build protects the home and avoids a far more disruptive repair later.

    This is where using qualified trades matters. BP Building & Maintenance manages bathroom renovation work with registered plumbing, qualified carpentry and certified waterproofing capability, so the layout and the technical work are considered together rather than passed between disconnected trades.

    How a bath or shower affects value

    There is no universal rule that a bath always adds more value. The better approach is to consider the property type and likely buyer or tenant. A family home with only one bathroom may appeal more broadly if it retains a bath. Buyers with young children often see it as a practical necessity.

    In a townhouse, apartment or home with a second bathroom containing a bath, removing an unused bath from an ensuite may be a sensible improvement. A generous walk-in shower, good vanity storage and quality finishes can be more attractive than a squeezed-in tub.

    If resale is part of the decision, avoid overcapitalising on a feature that reduces everyday function. A poorly proportioned bathroom will be noticed more than the absence of a bath. Clean lines, practical storage, reliable drainage and professional finishes tend to have stronger long-term appeal.

    A practical decision guide

    Choose a bath if you have young children, enjoy using one yourself, have a family-sized main bathroom or do not have another bath elsewhere in the home. Choose a walk-in shower if ease of access, open space and everyday convenience are the priority.

    Choose a shower-over-bath when the bathroom must serve both purposes but cannot accommodate separate fixtures. Choose both when the room is large enough to maintain comfortable clearances and a functional vanity area without compromise.

    It also depends on the existing structure. In older Melbourne homes, the condition of the subfloor, wall framing and plumbing can influence what is practical. During demolition, hidden issues sometimes come to light. Allowing for a proper inspection and contingency is wiser than forcing a layout that ignores the condition of the room.

    Plan the bathroom around the next ten years

    A good bathroom renovation should still feel practical well after the new tiles lose their novelty. Think about who will use the room as children grow, parents age or household routines change. If the room must do everything, a well-designed shower-over-bath may be the honest answer. If there is flexibility, separate bath and shower zones provide the broadest use.

    The best choice is the one that gives you a comfortable daily routine, protects the structure from water damage and fits the room without compromise. A measured on-site assessment is the right place to start, because the details behind the finished bathroom are what determine whether it performs properly for years.

  • A Practical Guide to Shower Drainage Design

    A Practical Guide to Shower Drainage Design

    A shower can look well finished and still cause expensive problems if water does not move quickly and reliably to the drain. This guide to shower drainage explains the decisions that need to be made before tiles are selected or walls are closed up. For homeowners planning a bathroom renovation, drainage is not a cosmetic detail. It affects waterproofing, floor levels, shower comfort, cleaning and the long-term protection of the room below and around it.

    Why shower drainage must be planned early

    A shower drain works as part of a complete wet-area system. The floor needs enough fall to direct water to the waste, the waste needs suitable capacity and placement, and the waterproofing membrane must be correctly detailed around every penetration. Tiles and grout sit over that system. They are not the waterproof barrier.

    Leaving drainage decisions until late in a renovation often creates compromises. The floor may need to be raised to create enough fall, the drain may end up in an awkward position, or the proposed tile size may not suit the floor geometry. These issues are especially common when converting an older enclosed shower into a walk-in shower.

    The best time to settle the drainage layout is during the design and strip-out stage, when the existing plumbing, slab or timber floor structure, and available floor depth can be properly assessed.

    Start with the shower style and layout

    The right drainage arrangement depends on how the shower will be used. A compact shower with a framed screen has different needs from an open walk-in shower used by a busy family. The goal is always the same: contain water, move it to the drain, and avoid relying on a bath mat or excessive squeegeeing to keep the bathroom dry.

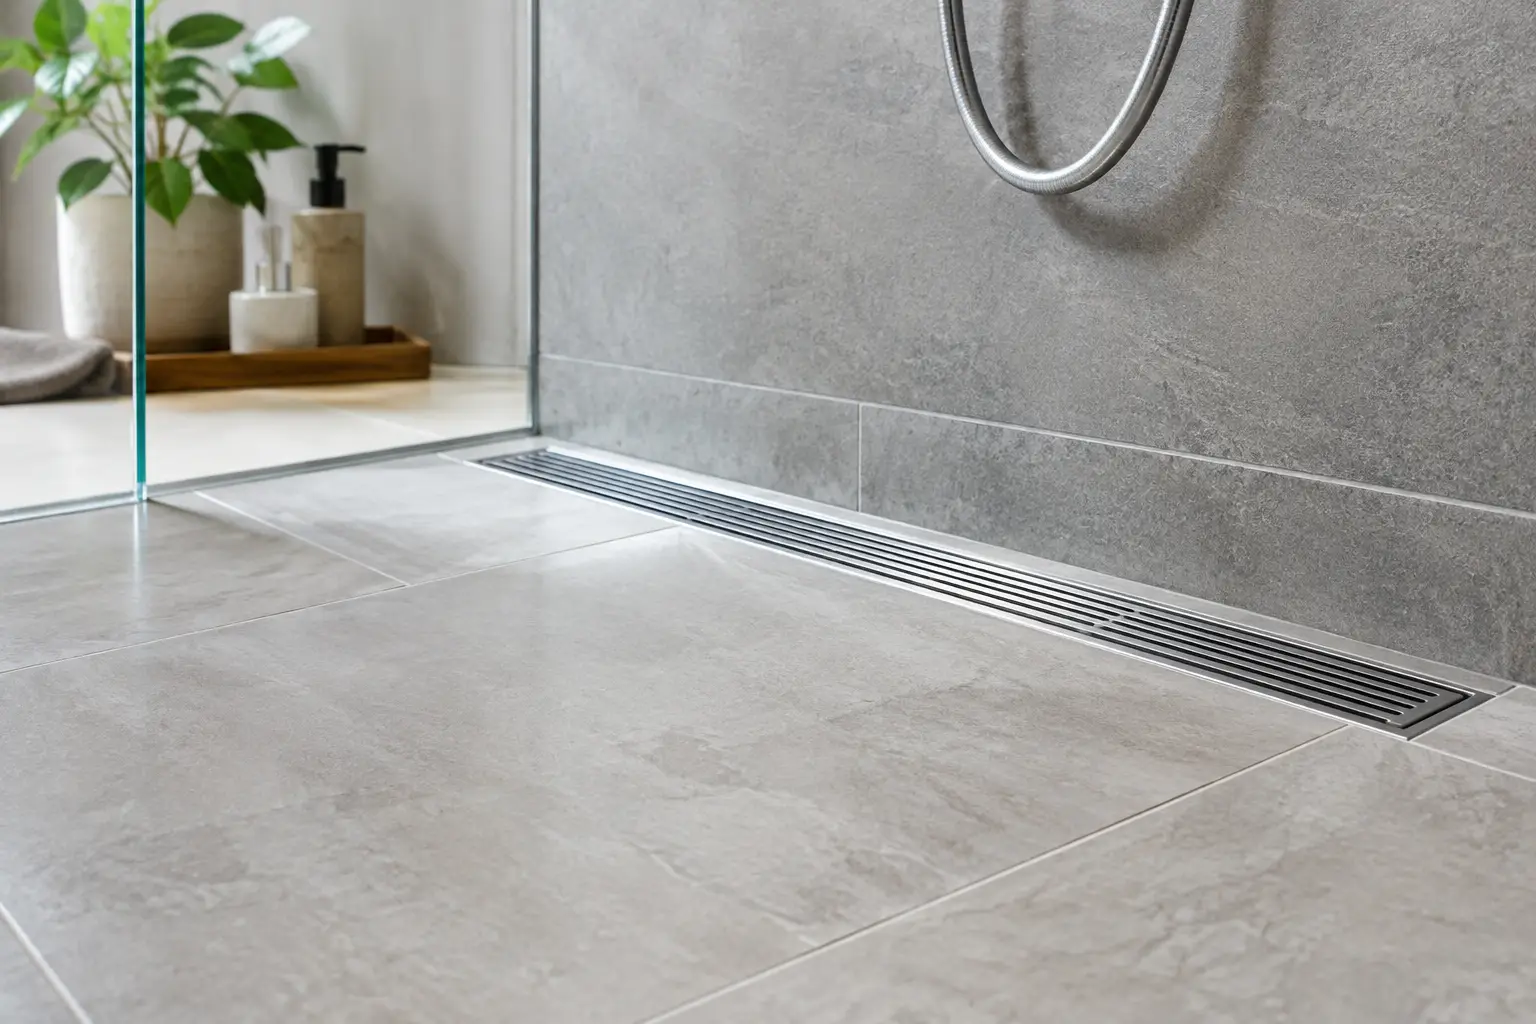
    An enclosed shower can often manage with a centrally located point drain because the shower base is clearly defined. A walk-in shower may benefit from a linear drain placed along the rear wall, at the entry, or to one side. This can allow the floor to fall in one consistent direction rather than from several angles.

    There is no single best layout. A linear drain can give a clean, contemporary look and work well with large-format tiles, but it must be installed accurately. A standard point drain is generally simpler, familiar and cost-effective, yet it may require more cuts in larger tiles and a multi-directional fall.

    Drain position controls the floor fall

    The location of the drain is one of the first technical decisions. Water needs a continuous fall towards it, without flat spots where water can pool. The required fall needs to be formed in the substrate, not improvised with a thick layer of adhesive during tiling.

    For a point drain in the centre of the shower, the floor falls from all sides. This suits smaller tiles or mosaics because they can follow the changes in direction more neatly. Large tiles can be used, but the cuts and joins need careful planning to avoid uneven edges or lipping.

    For a linear drain against a wall, the floor can generally fall in one plane. This often suits larger tiles and creates a tidy finish, but the wall connection and waterproofing detail need to be precise. The installer must also make sure the drain channel is level so water does not collect at one end.

    The practical guide to shower drainage components

    A reliable shower drainage system is more than the visible grate. Behind it are several parts that need to work together:

    • The waste pipe carries water away from the shower and must be correctly sized, connected and supported.
    • The drain body and grate collect water while allowing access for regular cleaning.
    • The floor screed or formed substrate creates the correct fall to the waste.
    • The waterproofing membrane protects the structure and is properly integrated with the drainage flange.
    • The tiles, adhesive, grout and sealant provide the finished surface and help manage daily moisture.

    The connection between the membrane and drain is particularly important. If this detail fails, water can bypass the drain assembly and enter the floor system or surrounding walls. That can lead to loose tiles, swollen timber, staining, mould and repair work that goes well beyond replacing a grate.

    A qualified renovation team coordinates the plumber, waterproofer and tiler so these stages are not treated as separate jobs. At BP Building & Maintenance, that practical coordination is central to delivering wet areas built for daily use, not just a quick handover photo.

    Waterproofing is not optional insurance

    Waterproofing is often hidden once a bathroom is complete, which is why it should never be treated as a shortcut area. The shower floor, wall junctions, penetrations and drainage connection all need suitable preparation and application in line with relevant Australian requirements.

    Before waterproofing begins, the substrate must be stable, clean and correctly formed. Cracked or poorly prepared surfaces can compromise the membrane. In older homes, a renovation may uncover water damage, movement in the floor, or plumbing that needs updating before any new lining or tiles go on.

    A proper process includes allowing materials to cure as required, checking falls before tiling, and protecting the finished membrane from damage by following trades. Fast turnaround matters, but rushing concealed work is a false economy.

    Tile choice affects drainage performance

    Tile selection should support the drainage design rather than fight it. Large-format porcelain can create a modern, low-joint look, particularly with a linear drain and single-plane fall. However, it is less forgiving where the floor needs to fall to a central point drain.

    Smaller tiles and mosaics are often a practical option for shower floors because more grout joints help them conform to the fall. They can also provide useful slip resistance, although the specific tile finish matters more than tile size alone. Very textured tiles may improve grip but can be harder to clean, especially in areas with soap residue and hard water.

    The shower floor should not be judged only by how it looks under showroom lighting. Consider barefoot grip, cleaning, the drain placement, and whether the selected tile can be laid without creating standing water at corners or along the shower entry.

    Walk-in showers need careful water control

    Walk-in showers are popular because they feel open, accessible and easy to maintain. They also require more thought than a shower enclosed by a raised tray and full screen. Without the right fall, screen position and shower-head placement, water can escape into the main bathroom area.

    A fixed glass panel can reduce splash while keeping the room visually open. The shower head should be positioned so its main spray is directed away from the entry, and the drain must cope with the expected water flow. In some layouts, a linear drain near the entry provides an extra line of defence. In others, it can create unnecessary complexity.

    If accessibility is a priority, a level-entry design may be possible, but the existing structure determines what can be achieved. Concrete slabs, floor joists, waste pipe depth and adjoining room levels all affect the final solution. An on-site assessment is the sensible starting point, not a copied layout from a display home.

    Warning signs your existing shower drainage needs attention

    Slow draining is the obvious warning sign, but it is not the only one. A blocked grate may be a simple maintenance issue. Repeated slow drainage, gurgling pipes or water backing up can indicate a deeper plumbing problem that should be investigated before a renovation proceeds.

    Look for water sitting on the shower floor long after use, cracked grout around the drain, soft or drummy tiles, musty odours, peeling paint outside the shower, or swelling in adjacent cabinetry. These signs do not automatically confirm waterproofing failure, but they justify a professional inspection.

    Cleaning the drain regularly also matters. Hair, soap build-up and debris reduce flow over time. Choose a drain grate that can be lifted easily for cleaning, especially in a household with long hair, pets or frequent shower use.

    What to confirm before work starts

    Before approving a bathroom renovation, ask how the shower fall will be created, where the waste will run, and how the waterproofing will connect to the drain. Confirm whether the proposed tile suits the floor design and whether any structural or plumbing changes are likely once the old bathroom is removed.

    A clear scope should also identify the shower screen arrangement, niche locations, fixture positions and finished floor levels. These details are connected. Moving a drain or changing to a larger tile late in the job can affect several trades and add avoidable cost.

    Good shower drainage is quiet workmanship: you should not have to think about it after the renovation is complete. When the layout, plumbing, waterproofing and tiling are planned as one system, the result is a bathroom that drains properly, cleans easily and stays dependable for years.

  • What Causes Bathroom Leaks in Melbourne Homes?

    What Causes Bathroom Leaks in Melbourne Homes?

    A bathroom leak rarely starts with water pouring through the ceiling. More often, it begins with a loose shower screen seal, a failed waterproofing membrane behind the tiles, or a slow pipe leak hidden inside a wall. By the time paint bubbles, tiles loosen or mould appears, the damage may already extend well beyond the bathroom.

    For homeowners asking what causes bathroom leaks, the short answer is that water has found a path past the surfaces and systems designed to contain it. Finding that path properly matters. Replacing a few cracked tiles or adding more silicone can make the room look better, but it will not fix a failed membrane or leaking pipework underneath.

    The most common causes of bathroom leaks

    Bathrooms are wet areas, so every part of the build needs to work together: plumbing, drainage, waterproofing, tiling, sealing and ventilation. A fault in any one area can allow moisture into floors, walls and adjoining rooms.

    Failed or damaged waterproofing

    Waterproofing is the barrier behind the finished surface. It protects the structure when water passes through grout lines, around fixtures or into the shower area. Tiles and grout are not waterproof on their own, despite what many people assume.

    A membrane can fail because it was applied poorly, damaged during tiling, not carried high enough on shower walls, or not correctly treated at corners, wall-to-floor junctions and pipe penetrations. In older bathrooms, the waterproofing may simply have reached the end of its serviceable life.

    This is one of the more serious causes of bathroom leaks because the problem is concealed. You may notice a persistent musty smell, swollen skirting boards in the next room, flaking paint, loose tiles or discolouration on a ceiling below. In a ground-floor bathroom on a concrete slab, the signs can be less obvious, but the moisture can still damage wall framing, cabinetry and surrounding finishes.

    Cracked grout, failed silicone and worn seals

    Grout and silicone have different jobs. Grout fills the gaps between tiles, while flexible silicone seals movement joints, corners, shower screens, baths and vanity edges. Both wear over time.

    Cracked grout may let more water reach the substrate, especially in a heavily used shower. Failed silicone is often more immediately troublesome because it opens a direct gap at a corner or fixture. Blackened, lifting, split or missing silicone should be dealt with promptly.

    However, there is a trade-off here. Regrouting or resealing can be a sensible maintenance repair where the underlying waterproofing is sound. It is not a reliable cure for a leak caused by failed waterproofing behind the tiles. A proper inspection helps separate a surface-maintenance issue from a renovation-level problem.

    Leaking pipes and plumbing connections

    Not every bathroom leak comes from the shower. Water supply pipes, waste pipes, tap bodies, toilet connections, mixers and flexi hoses can all leak inside cabinetry, walls or floors.

    A pressure leak from a water line may appear even when nobody is using the bathroom. A waste-pipe leak usually shows up only when the basin, shower or bath is draining. Toilets can leak at the pan collar or cistern connection, while a loose basin waste may cause damage inside the vanity long before water becomes visible on the floor.

    These faults need a registered plumber. The source may be behind a wall, under a floor or inside a vanity, and guessing can lead to unnecessary demolition. A plumber can assess the pipework, connections and drainage before repair work is planned.

    Poor shower drainage and incorrect falls

    Water should run towards the floor waste, not sit along the shower edge or travel out into the bathroom. If a shower floor has poor falls, an incorrectly placed drain or a low shower screen, water can escape every time the shower is used.

    Ponding is more than an annoyance. Standing water puts extra pressure on grout, seals and waterproofing, and it can soak into the bathroom floor outside the shower. A walk-in shower needs particularly careful design because it relies on correctly formed falls and a well-detailed waterproofing system rather than a raised shower base.

    Sometimes the issue is as simple as a blocked floor waste. Hair, soap residue and general build-up can slow drainage and cause water to back up. If cleaning the waste does not improve it, the drainage layout or pipework may need investigation.

    Cracked tiles and movement in the substrate

    A cracked tile does not always mean the bathroom is leaking, but it should not be ignored. Tiles can crack because of impact, movement in the floor or walls, inadequate substrate preparation, or a lack of movement joints.

    When tiles sound hollow, lift, crack in a pattern or separate at the joints, there may be moisture affecting the adhesive or movement beneath the tile bed. Simply replacing the visible cracked tile may be possible in a localised area, but widespread cracking or drummy tiles calls for a closer look at the substrate and waterproofing.

    Shower screens, baths and fixtures that are not sealed correctly

    The junctions around showers, baths, vanities and toilets are common weak points. A shower screen can leak where it meets the wall or floor. A bath may allow water down the wall cavity if the wall junction has not been sealed and waterproofed correctly. A vanity that is tight against a tiled wall can hide a slow leak from the basin waste or tap connections.

    Water can also enter around poorly sealed pipe penetrations. These small openings are easy to overlook, yet they are exactly where water tends to track behind finishes. Good wet-area work pays close attention to these details, not just the tiles you can see.

    Why bathroom leaks can become expensive quickly

    Water follows gravity, gaps and framing. A leak from an upstairs ensuite can damage ceilings, insulation, electrical fittings and rooms below. On a single level home, moisture may travel into adjoining bedrooms, hallways or kitchen walls before it becomes obvious.

    Mould is another concern. It thrives where materials stay damp, particularly behind vanities, within wall cavities and under flooring. Ventilation helps manage steam and condensation, but an exhaust fan cannot solve water entering through a failed membrane or pipe connection.

    There is also the question of compliance. Bathroom waterproofing is specialist work with requirements around substrate preparation, membrane application and detailing. Cutting corners during a renovation may save money at the start, but rectifying a leaking bathroom often means removing tiles, fixtures and sometimes wall linings to reach the cause.

    Signs you should arrange an inspection

    A one-off splash outside the shower is not necessarily a building issue. Repeated signs of moisture, however, deserve professional attention. Watch for:

    • peeling or bubbling paint on walls, ceilings or nearby skirting boards
    • mould or persistent musty smells that return after cleaning
    • loose, cracked or hollow-sounding tiles
    • swelling vanity panels, warped flooring or staining in an adjoining room
    • water pooling away from the floor waste or leaking from the shower screen
    • unusually high water bills or a water meter that continues moving when taps are off

    If water is visible near electrical fittings, turn off the affected circuit if it is safe to do so and arrange urgent professional help. Do not keep using the shower while water is reaching a ceiling below or spreading into another room.

    The right fix depends on the source

    The best repair is not always a full bathroom renovation. A leaking flexi hose, failed basin waste or deteriorated shower seal may be resolved with a targeted repair. That is why diagnosis comes first.

    Where a bathroom has widespread tile movement, leaking shower areas, damaged wall linings or failed waterproofing, a more complete strip-out may be the honest option. This allows the structure to dry, defective materials to be removed, plumbing to be checked, and a new waterproofing system to be installed before tiling and fit-off. It is more involved, but it addresses the cause rather than covering up the symptoms.

    For homes in Caroline Springs and Melbourne’s western suburbs, BP Building & Maintenance can assess bathroom leak concerns as part of a planned bathroom upgrade or rectification project. The work should be managed by qualified trades who understand plumbing, waterproofing, carpentry and tiling as one connected system.

    A bathroom should handle daily showers without making you inspect the ceiling below. If the same damp patch, mould growth or shower leak keeps returning, treat it as a signal to find the source properly before a minor repair becomes a major rebuild.

  • Caroline Springs Bathroom Renovation Guide

    Caroline Springs Bathroom Renovation Guide

    A bathroom can look dated long before it stops working, but the bigger issue is often hidden behind the tiles. Loose shower screens, cracked grout, poor drainage and old waterproofing can all lead to expensive water damage. This Caroline Springs bathroom renovation guide explains how to plan a renovation that improves daily use, meets the technical requirements of a wet area and holds up over time.

    For most homeowners, the goal is straightforward: a bathroom that is easier to use, easier to clean and built properly from the inside out. Achieving that takes more than choosing attractive tiles and tapware. It requires a clear scope, capable trades and the right work sequence.

    Start with how the bathroom needs to work

    Before selecting finishes, look closely at what is frustrating about the current room. A cramped vanity, a shower that sprays across the floor or a toilet placed too close to the door will affect the result every day. A renovation is the opportunity to fix these practical problems, not just cover them with new products.

    Consider who uses the bathroom and how. A busy family bathroom may need more storage, hard-wearing finishes and a bath. An ensuite may benefit more from a generous walk-in shower, wall-hung vanity and improved lighting. For households planning to stay long term, a low-threshold shower and wider circulation space can make the room more comfortable as needs change.

    Keeping plumbing in its existing position can help control cost and shorten the job. Moving a toilet, shower or vanity is entirely possible, but it can involve extra plumbing work, floor alterations and more coordination. Sometimes moving one fixture delivers a far better layout and is worth the additional spend. It depends on the existing room, access beneath the floor and the outcome you want.

    Measure the room, then plan clearances

    Accurate measurements are the starting point for a workable design. Door swings, window positions, ceiling heights, waste locations and existing services all influence what can be installed. A layout should allow comfortable access to the shower, vanity and toilet rather than making the room look good only on a plan.

    Storage deserves proper attention at this stage. Recessed shaving cabinets, vanity drawers and built-in niches can remove clutter without taking up valuable floor space. In smaller Caroline Springs homes and townhouses, these details can make a compact bathroom feel more organised without increasing its footprint.

    Build the budget around the work behind the tiles

    Bathroom renovation pricing varies because every existing bathroom carries different conditions. A simple strip-out with fixtures staying in place is not the same as a full rebuild involving plumbing changes, damaged subfloors, framing repairs and custom joinery. A detailed quote should make clear what is included, what is assumed and how unforeseen site issues will be handled.

    The core cost areas usually include demolition and rubbish removal, plumbing, carpentry, waterproofing, tiling, electrical work where required, fixtures, cabinetry, shower screens and final fit-off. Product choices also make a significant difference. Large-format tiles, feature walls, stone tops, freestanding baths and custom-made vanities can add to the budget through both supply and installation time.

    Cheap quotes can become costly when critical work is excluded or rushed. Waterproofing and plumbing are not the places to compromise. If these stages fail, the visible finishes often need to be removed before the underlying issue can be repaired. Spending appropriately on qualified trades and sound preparation protects the rest of the renovation.

    Allow for what may be uncovered

    Once old tiles and linings are removed, a renovation may reveal water-damaged timber, mould, failed sheeting or uneven floors. Not every bathroom has these issues, but older wet areas are more likely to have hidden defects. Set aside a realistic contingency so necessary repairs do not force poor decisions later in the project.

    It is also sensible to confirm whether any building, strata or owner corporation requirements apply before work begins. This is particularly relevant for apartments, townhouses and properties with shared services. A good renovation plan deals with access, protection of common areas and approved work hours before demolition day.

    The Caroline Springs bathroom renovation guide to waterproofing

    Waterproofing is the line of defence between everyday shower use and the structure of your home. Grout and silicone are finishing materials, not substitutes for a correctly applied waterproofing system. The waterproofing membrane sits beneath the tiles and must be applied to a properly prepared surface, with careful treatment around junctions, penetrations, shower areas and floor wastes.

    A certified waterproofer understands that preparation matters as much as the membrane itself. Substrates need to be sound, compatible and correctly detailed before waterproofing starts. Falls to the waste must also be considered so water drains as intended rather than sitting in corners or travelling outside the shower area.

    The correct approach varies between a fully enclosed shower, an open walk-in shower and a wet-room style layout. Walk-in showers are popular for their clean appearance and easy access, but they need accurate floor falls, effective drainage and a screen layout that keeps water where it belongs. A larger room gives more flexibility. In a tight room, a traditional shower enclosure may be the more practical choice.

    Ask who is completing the waterproofing and how it fits into the overall construction sequence. There should be no confusion about responsibility between trades. BP Building & Maintenance manages complete bathroom renovations with a registered plumber, qualified carpenter and certified waterproofer involved in the work that matters most.

    Choose finishes for daily use, not the showroom

    A bathroom can have a modern look without being difficult to maintain. Tiles with a practical slip rating are worth considering for shower floors, particularly in family bathrooms. Very textured tiles can offer grip but may take longer to clean. Highly polished tiles can look sharp, though they may show water spots and require more care.

    Large tiles can reduce grout lines and create a more open appearance, but they demand a flatter substrate and careful cutting around wastes and fixtures. Smaller tiles can work well on shower floors because they follow falls more easily. A balanced combination often gives the best result: larger tiles on walls and main floor areas, with suitable smaller tiles in the shower.

    For tapware and accessories, consider parts availability and finish durability as well as appearance. Matte black and brushed finishes remain popular, but they can show marks differently depending on water quality and cleaning habits. Chrome is still a practical option for many homes because it is widely available, easy to match and straightforward to maintain.

    Lighting and ventilation are part of the renovation

    Poor lighting makes even a well-finished bathroom feel flat. Include functional lighting at the mirror, general lighting across the room and adequate illumination in the shower area. The final arrangement should suit the room and comply with the relevant electrical requirements.

    Ventilation is equally important. An exhaust fan sized and located appropriately helps manage steam and reduces the chance of persistent moisture on walls and ceilings. Where there is an existing window, it helps, but it may not be enough on its own for a heavily used bathroom. Good ventilation protects paintwork, cabinetry and the room’s overall condition.

    Expect a staged renovation, not a rushed cosmetic job

    A full bathroom renovation generally follows a set sequence. The old room is stripped out, any required framing or floor repairs are completed, and plumbing and electrical rough-ins are carried out. Wall and floor substrates are prepared, waterproofing is applied, then tiling, cabinetry, screens, fixtures and final fit-off follow.

    The timing depends on the room’s condition, product lead times, tile complexity and whether plumbing locations are changing. Drying and curing times also matter. Rushing waterproofing, adhesives or sealants to meet an unrealistic deadline can undermine the finish. A clear schedule should balance a prompt turnaround with the time needed for each trade to do the job correctly.

    During construction, homeowners should expect some noise, dust and temporary loss of bathroom access. Proper site protection, rubbish removal and communication make this period far easier to manage. If the home has only one bathroom, discuss the expected downtime and any practical arrangements before the project starts.

    Questions worth asking before you approve a quote

    The right contractor should be comfortable explaining the scope in plain language. Ask whether demolition, rubbish removal, waterproofing, plumbing, tiling and final fit-off are included. Confirm who is responsible for each trade, whether the bathroom layout has been checked on site and what happens if hidden damage is found after strip-out.

    Also ask about the products you are supplying versus the products being supplied as part of the quote. This avoids delays caused by missing components, incorrect sizes or tapware that does not suit the planned installation. A bathroom is a tightly coordinated space, so choices made early prevent expensive changes once tiling is underway.

    A well-planned bathroom should feel simple once it is finished: water drains properly, storage is where you need it, surfaces are practical and every fixture works as it should. That result starts with a clear scope and qualified workmanship, not a quick cover-up of the old room.

  • Do Bathroom Renovations Need Waterproofing?

    Do Bathroom Renovations Need Waterproofing?

    A bathroom can look finished the day the tiles are laid, but the work that protects the home sits underneath them. So, do bathroom renovations need waterproofing? In nearly every renovation involving a shower, bath, vanity, toilet or wet floor area, the answer is yes. Proper waterproofing is not an optional upgrade. It is the barrier that helps stop water reaching framing, plaster, flooring and adjoining rooms.

    For homeowners across Melbourne’s western suburbs, waterproofing is one of the most important parts of a bathroom renovation – and one of the hardest to inspect once the room is complete. Getting it right before tiling protects the value, safety and lifespan of the renovation.

    Do bathroom renovations need waterproofing under Australian rules?

    A full bathroom renovation generally requires waterproofing work that meets the applicable building requirements and Australian Standards, including AS 3740 for waterproofing of domestic wet areas. The exact scope depends on the bathroom layout, the type of shower, the substrate and whether the room is being fully stripped out or only partly updated.

    Bathrooms are classified as wet areas because regular splashing, steam and plumbing leaks are expected. Tiles and grout are water-resistant finishes, but they are not a complete waterproofing system. Grout can crack, silicone can deteriorate and water can work through small gaps over time. The membrane beneath the finish is what manages that risk.

    A compliant waterproofing system usually includes the shower floor, shower walls, wall-to-floor junctions, penetrations around pipes, and other areas exposed to water. Where a bathroom has a hobless or walk-in shower, the floor falls, drainage and waterproofing details need even more care. Water has no respect for a new vanity or expensive tile choice – it will follow the lowest point and find the weakest joint.

    When waterproofing is required – and when it may not be

    If the renovation includes demolition, new wall linings, a new shower, relocated plumbing, floor tiling or a new bath, waterproofing should be part of the scope. A bathroom that has been stripped back provides the right opportunity to assess the subfloor, repair damaged framing, set correct falls and install a complete membrane system before finishes go on.

    There are limited situations where a full waterproofing job may not be necessary. Replacing a mirror, changing tapware without opening wall linings, installing a new toilet in the same position or swapping a vanity can be cosmetic work rather than a wet-area rebuild. Even then, any disturbed seals, damaged tiles or leaking connections should be addressed properly.

    The difference comes down to what has been opened, altered or exposed. If a shower base is removed, tiles are lifted, plumbing penetrations are changed, or wall and floor junctions are disturbed, patching around the edges is rarely the right answer. The bathroom needs a considered waterproofing plan, not a quick cover-up.

    What proper bathroom waterproofing involves

    Waterproofing is not simply rolling a coating over the floor the day before tiles are installed. The quality of the result depends on preparation, material selection and the sequence of trades.

    First, the substrate needs to be sound, clean and suitable for the chosen membrane. Cement sheet, screed, fibre cement and other surfaces may need priming or preparation according to the product system. Any movement, loose material, moisture issues or damage should be rectified before the membrane is applied.

    The waterproofer then treats vulnerable points such as internal corners, wall-to-floor junctions, shower hobs, drains and pipe penetrations. Bond breakers and reinforcing components allow for minor building movement at joints, helping prevent the membrane from splitting where it is under the most stress.

    The membrane is applied at the correct coverage and thickness, with sufficient drying time between coats. Rushing this stage can cause poor adhesion or incomplete coverage. Once cured, the area is ready for tiling, with the tiler working carefully to avoid puncturing or compromising the waterproof layer.

    In a well-managed renovation, the plumber, carpenter, waterproofer and tiler work in the right order. That coordination matters. For example, a poorly positioned drain, an incorrect shower fall or a late plumbing change can affect a waterproofed area and create rework.

    The expensive consequences of poor waterproofing

    Waterproofing failures often stay hidden for months or years. The first signs may be mould around skirting boards, peeling paint in the next room, swollen timber flooring, loose tiles, damp carpet or a musty smell. By the time those symptoms appear, water may already have damaged materials behind the wall or below the floor.

    Common causes include insufficient membrane coverage, missed corners, poorly sealed penetrations, cracked grout, failed silicone and inadequate falls toward the drain. A shower can look neat on the surface while water is slowly escaping behind it every time it is used.

    Repair costs can quickly exceed the saving made by cutting corners at the start. Fixing a failed shower may involve removing tiles, wall linings, shower screens and fixtures just to access the waterproofing layer. If timber framing, flooring or an adjoining room has been affected, the repair scope grows further.

    For property owners, there is also the issue of resale confidence. A bathroom renovation should make a home easier to live in and more appealing to buyers, not create questions about leaks, mould or unapproved work. Clear workmanship records and properly completed trade work provide far better peace of mind.

    Walk-in showers need extra planning

    Walk-in showers are popular because they create a clean, open look and can make a smaller bathroom feel larger. They also demand accurate set-out. Without a traditional shower hob, water must be contained through well-designed floor falls, drain placement, screen positioning and waterproofing coverage.

    This does not mean a walk-in shower is risky when built correctly. It means the design needs to be practical from the beginning. A stylish large-format tile may affect drainage falls. A fixed glass panel may need to be positioned to reduce splash. A linear drain can work well, but it needs correct installation and compatible falls.

    The best approach is to plan the shower as a complete system rather than selecting individual features separately. That prevents the common problem of trying to solve drainage or splash issues after tiling has already begun.

    Why qualified trades matter in a wet-area renovation

    Bathroom renovations bring several trades together in a small space. Plumbing rough-in, carpentry, wall preparation, waterproofing, tiling and final fixture installation all affect the finished result. A problem in one stage can undermine the next.

    Using qualified, experienced trades gives you a clearer process and better accountability. A registered plumber can manage water and drainage connections correctly. A qualified carpenter can repair or alter the structure where required. A competent waterproofer can prepare and apply the membrane system to suit the room and product specifications.

    At BP Building & Maintenance, complete bathroom renovations are managed with the full wet-area sequence in mind, from strip-out and plumbing through to waterproofing, tiling and fit-off. This avoids the gaps that can occur when homeowners are left coordinating separate trades themselves.

    It is worth asking exactly what the quote includes. A proper renovation quote should make clear whether demolition, substrate repairs, waterproofing, drainage adjustments, tiling and silicone sealing are included. The lowest price can become the most expensive option if essential preparation is excluded or treated as an afterthought.

    A better way to approach your bathroom renovation

    Before choosing tiles or tapware, decide how the bathroom needs to function. Consider who uses it, where water will land each day, whether a walk-in shower suits the space, and whether existing leaks or movement need to be rectified. These practical decisions shape the waterproofing and construction work beneath the visible finishes.

    A bathroom should be built to handle daily use, not just look good at handover. When waterproofing is planned early and completed properly, you can enjoy the renovation knowing the work behind the tiles is built for the long term. If you are planning a bathroom upgrade, a detailed on-site assessment and clear quote are the right place to start.

  • 10 Small Bathroom Makeover Examples That Work

    10 Small Bathroom Makeover Examples That Work

    A small bathroom does not need more decorations. It needs better decisions. The most successful small bathroom makeover examples start by fixing the layout, water management and storage problems that make the room feel cramped or dated. Once those fundamentals are right, the finishes have room to do their job.

    For homes across Melbourne’s western suburbs, that often means replacing a bulky shower, removing a tired vanity, improving ventilation and rebuilding the wet area properly. A smaller footprint leaves less margin for error, particularly when waterproofing, drainage and clearances are involved.

    1. Replace a shower-over-bath with a walk-in shower

    In many older bathrooms, the shower-over-bath takes up visual and physical space while being awkward for daily use. Replacing it with a fixed glass walk-in shower can make the room feel more open from the doorway, even when the actual floor area has not changed.

    A single clear glass panel is usually less visually heavy than a framed enclosure with sliding doors. Continuing the same floor tile into the shower area also reduces the number of visible breaks in the room. The result is a cleaner, more generous look.

    This option depends on who uses the bathroom. A family with young children may still need a bath elsewhere in the home. If the room is the only bathroom, retaining a compact bath can be the practical choice. If it is an ensuite or a second bathroom, a walk-in shower often delivers better everyday function.

    2. Use a floating vanity to reveal more floor

    A wall-hung vanity is one of the most reliable small bathroom makeover examples because it creates visible floor space beneath the cabinet. That open area makes a compact room feel less boxed in and gives tiles, rather than cabinetry, more visual presence.

    Choose a vanity with drawers rather than deep cupboards where possible. Drawers make it easier to reach toiletries without crouching or digging through the back of a cabinet. A model with an offset basin can provide a useful strip of benchtop for soap and daily items.

    The trade-off is storage capacity. A very slim floating vanity will not hold as much as a full-depth floor-standing unit. The right answer is usually a vanity sized to the household’s actual needs, paired with a recessed shaving cabinet rather than an oversized cabinet that dominates the wall.

    3. Build storage into the wall, not into the walkway

    Small bathrooms work best when storage does not project into the room. A recessed mirrored cabinet above the vanity can hold medication, skincare and grooming items without adding depth. In a shower, a properly constructed tiled niche keeps bottles off the floor and avoids the clutter of hanging caddies.

    A niche must be planned before tiling begins. Its position should work with the tile layout, shower fittings and waterproofing system. It also needs enough fall at the base to drain properly. This is not a cosmetic afterthought – it is part of the wet-area construction.

    For a particularly narrow room, consider a tall, shallow linen cabinet on a clear wall rather than a deep cupboard beside the vanity. Keeping the central path open matters more than squeezing in an extra-large cabinet.

    4. Make the tiles work harder

    Large-format tiles can suit a small bathroom surprisingly well. Fewer grout lines create a calmer surface and can make walls and floors feel less busy. Using a similar tile tone across both areas helps the room read as one continuous space.

    That does not mean every small bathroom should be white from floor to ceiling. Warm grey, soft stone, muted green and light timber-look finishes can all work well. The key is restraint. If the floor has a strong pattern, keep the wall tiles simpler. If you want a feature wall, use it in one defined area, such as behind the vanity or within the shower.

    Tile size also needs to suit falls and drainage. Smaller tiles may be necessary on a shower floor because they can follow the required slope more effectively. A qualified renovator can balance the finished look with the practical requirements of drainage, slip resistance and clean installation.

    5. Swap a swing door for a better entry solution

    A door that opens into a compact bathroom can consume valuable usable space. In the right layout, changing the direction of the door swing can free up room for a larger vanity, a better shower entry or clearer access to the toilet.

    A cavity slider is another option, although it is not always straightforward. It depends on what is inside the wall, including plumbing, electrical work and structural framing. A sliding door should be assessed during planning, not selected after demolition has started.

    Even a simple change to door hardware and swing direction can make a tight bathroom feel easier to use. It is a small detail with a large effect on circulation.

    6. Add a large mirror and purposeful lighting

    A large mirror above the vanity reflects light and breaks up a solid wall. It is one of the quickest ways to make a compact bathroom feel brighter, but it needs lighting that supports it. A single ceiling light can cast shadows across the face, particularly when someone is standing at the basin.

    Good small-bathroom lighting usually combines general ceiling lighting with even illumination around the mirror. Backlit mirrors can add a clean finish, while wall lights beside the mirror may provide better task lighting where the layout allows.

    Natural light is also worth protecting. Avoid heavy window coverings or tall cabinetry that blocks the window. Privacy glass, a high window or a well-positioned blind can retain privacy without turning the room into a dark box.

    7. Choose compact fittings with comfortable clearances

    Compact does not have to mean uncomfortable. A short-projection toilet, slimline basin and wall-mounted tapware can reduce the depth of fixtures while keeping the room functional. Wall-hung toilets can create a cleaner floor line, although they require suitable in-wall framing and access for the concealed cistern.

    When selecting fittings, look beyond the showroom display. Measure the room and allow for door swings, shower access, towel rails and elbow room at the basin. A vanity that looks modest in a large display centre can overwhelm a narrow bathroom.

    It is also worth considering cleaning. Floor-mounted vanities and standard toilets can be the most economical choice, while wall-hung fittings make the floor easier to clean. The best selection depends on budget, construction requirements and how the room will be used.

    8. Turn an awkward laundry-bathroom into a defined wet area

    Some older homes have a toilet, shower and laundry all competing for space. A practical makeover may involve relocating the washing machine, installing a compact laundry cabinet or creating a clearer separation between wet and dry zones.

    The goal is not necessarily to fit more into the room. It is to make the existing functions safer and easier to use. Proper waterproofing behind tiled walls, correct drainage and careful plumbing placement are particularly important when laundry appliances sit close to shower areas.

    Where space allows, a custom vanity or laundry cabinet can use an awkward recess far better than an off-the-shelf unit. This is where accurate site measurement and trade coordination make a noticeable difference.

    9. Use one strong feature, not five competing ones

    A small bathroom can still have personality. The mistake is introducing a patterned floor, bold wall tile, coloured vanity, feature tapware and statement lighting all at once. In a limited space, every finish is close to the next, so visual clutter builds quickly.

    Choose one feature that suits the home. It could be a timber-look vanity, a vertically laid wall tile, brushed nickel tapware or a textured shower wall. Keep the remaining finishes quieter and repeat one or two colours to create a considered result.

    This approach also ages better. A bathroom renovation should still look good after years of daily use, not only on handover day.

    10. Start with the work behind the tiles

    The best-looking makeover will not last if the waterproofing, plumbing and substrate preparation are poor. In a small bathroom, water can reach every wall and junction quickly. A leaking shower recess or failed seal can lead to damaged framing, loose tiles, mould and expensive rectification work.

    A complete renovation should allow for proper strip-out, plumbing rough-in, substrate preparation, certified waterproofing, tiling, fixture installation and final fit-off. Rushing these stages to save a few days or dollars is a false economy.

    BP Building & Maintenance manages complete bathroom renovations with qualified trade work across Caroline Springs and surrounding western suburbs. The priority is a bathroom that looks sharp, drains correctly, is built to last and works for the people using it every day.

    Before choosing tiles or tapware, stand in the current room and identify what is genuinely frustrating: poor shower access, nowhere to store towels, a vanity that blocks the door, dark corners or concerns about water damage. Those answers will point you towards a makeover that improves more than appearance.