Category: Bathroom Renovation Advice

  • Complete Bathroom Remodel Cost in Melbourne

    Complete Bathroom Remodel Cost in Melbourne

    A bathroom quote can look straightforward until you see how much work sits behind the finished room. The real complete bathroom remodel cost is not just tiles, a vanity and a shower screen. It is demolition, plumbing, waterproofing, carpentry, tiling, fit-off, waste removal and the kind of detail that decides whether the bathroom still performs properly in ten years.

    If you are planning a full renovation, the smartest place to start is with what drives cost up, what is worth paying for, and where cutting corners usually comes back to bite. For most homeowners, the question is not simply how cheap can it be. It is how to get a bathroom that works well, looks right and holds up under daily use.

    What is a complete bathroom remodel cost likely to include?

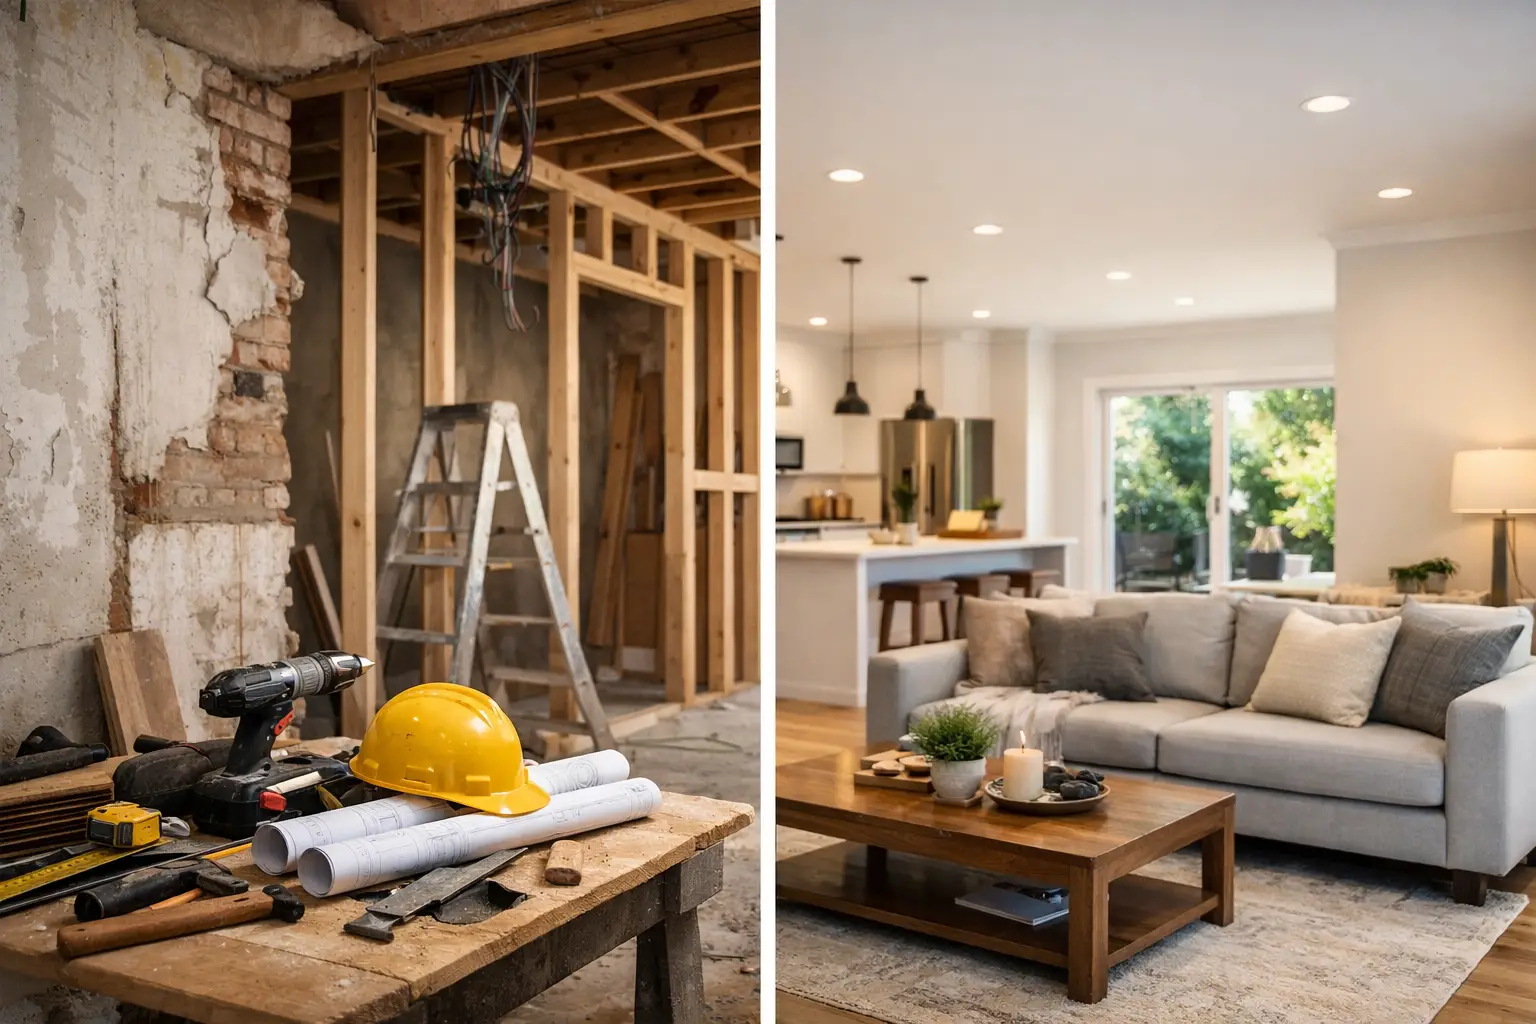
    A complete bathroom remodel cost usually covers the full strip-out of the existing space and the rebuild of the new one from the floor up. That includes removing old tiles, fixtures, wall linings and fittings, then preparing the room for new plumbing, waterproofing and construction work.

    From there, the major cost areas are usually rough-in plumbing, electrical work where needed, screeding or floor preparation, certified waterproofing, wall and floor tiling, shower base or walk-in shower construction, vanity installation, toilet and tapware fit-off, painting and final clean-up. If the job includes custom joinery, recessed niches, frameless shower screens or layout changes, the price lifts accordingly.

    This is why two bathrooms that look similar in photos can come in at very different figures. One may be a simple replacement of existing fixtures in the same positions. The other may involve moving plumbing points, repairing damaged wall framing or correcting poor work from a previous renovation.

    The biggest factors that affect complete bathroom remodel cost

    Size matters, but layout matters more

    A bigger bathroom generally costs more because it needs more tiles, more labour and more materials. But size on its own is not the full story. A small bathroom with a difficult layout, tight access and extensive custom work can cost more per square metre than a larger, more straightforward room.

    If you are keeping the existing toilet, vanity and shower in roughly the same positions, you will usually save on plumbing and construction time. Once you start moving waste points, changing the shower location or converting a standard shower to a walk-in design, the scope expands quickly.

    Waterproofing is not the place to save

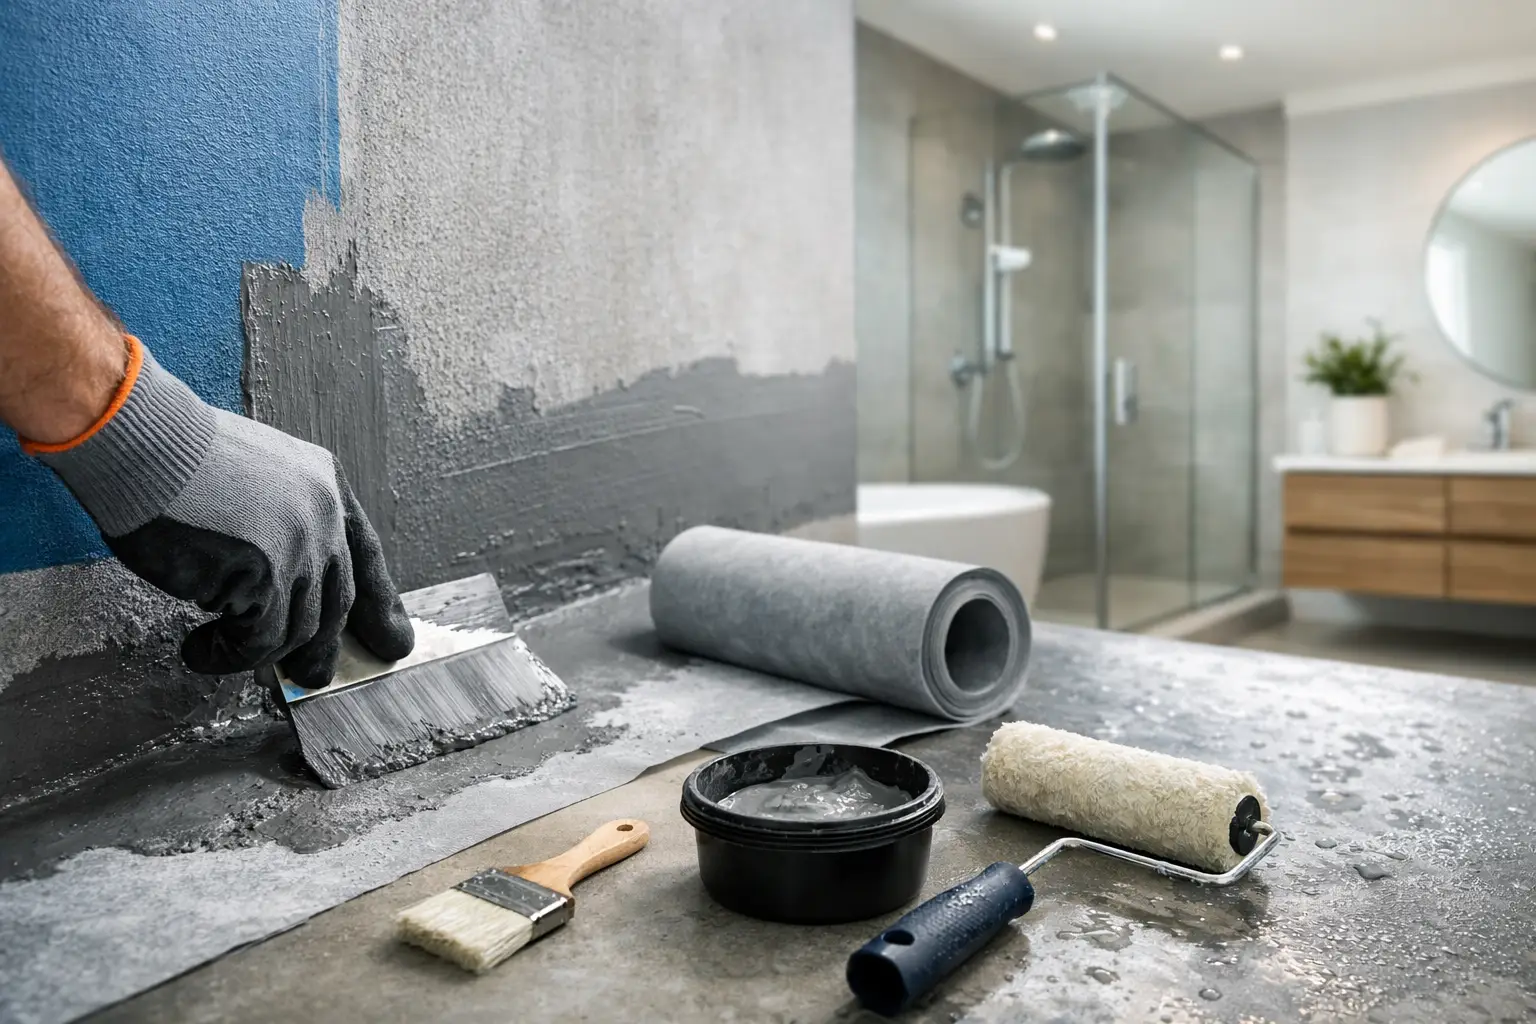
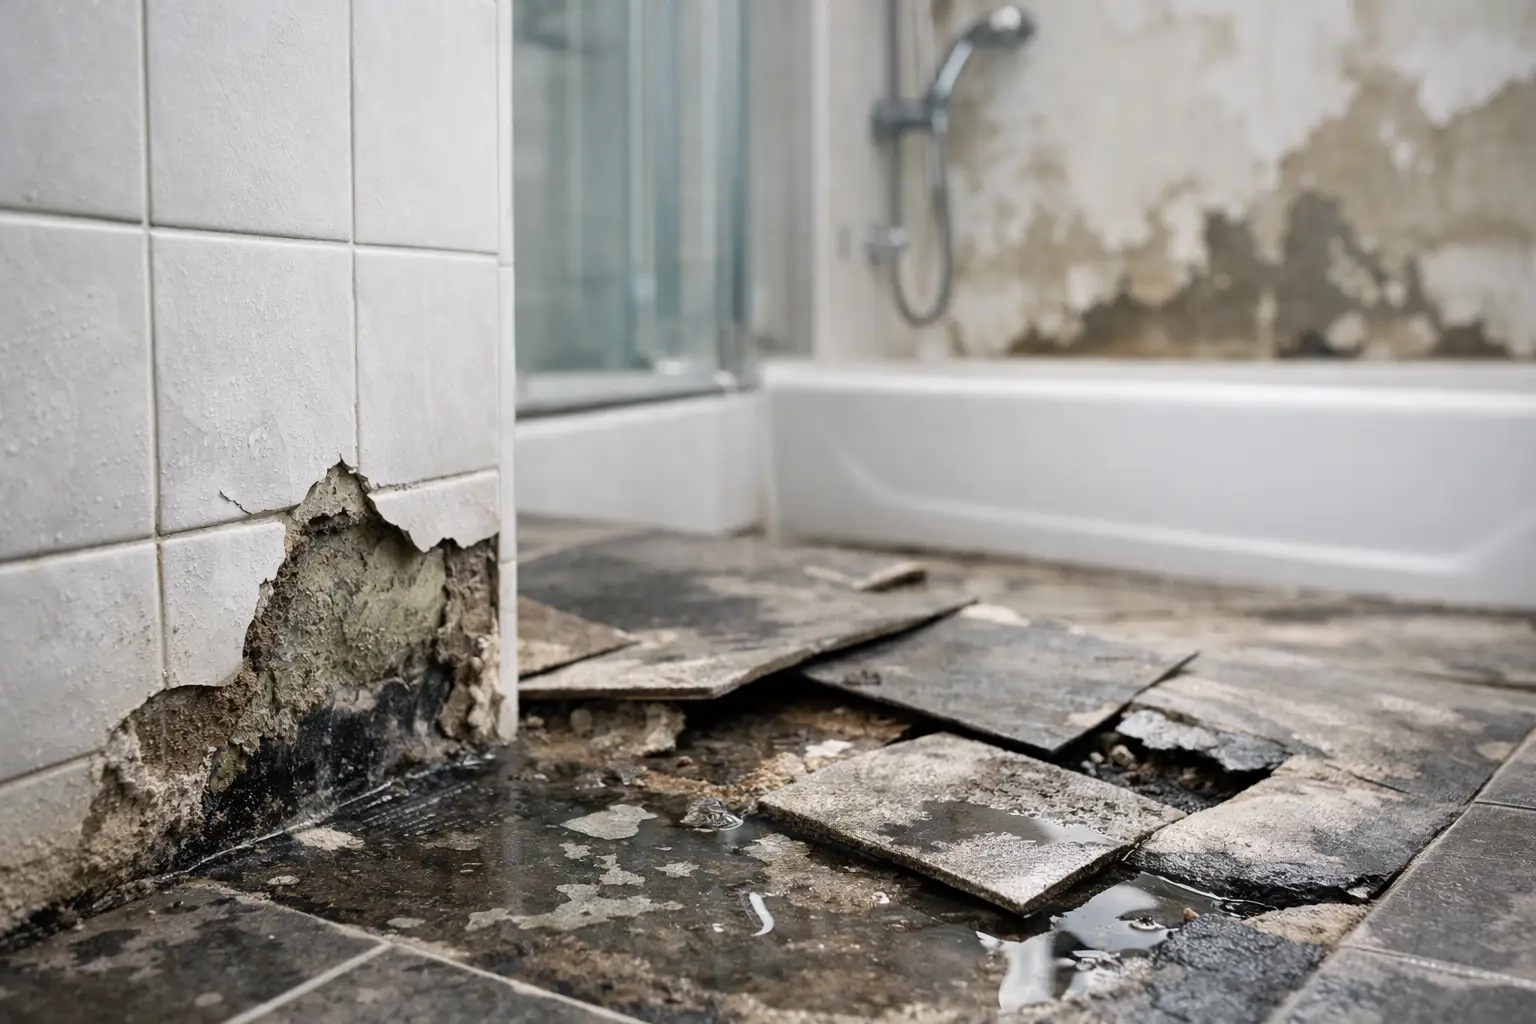
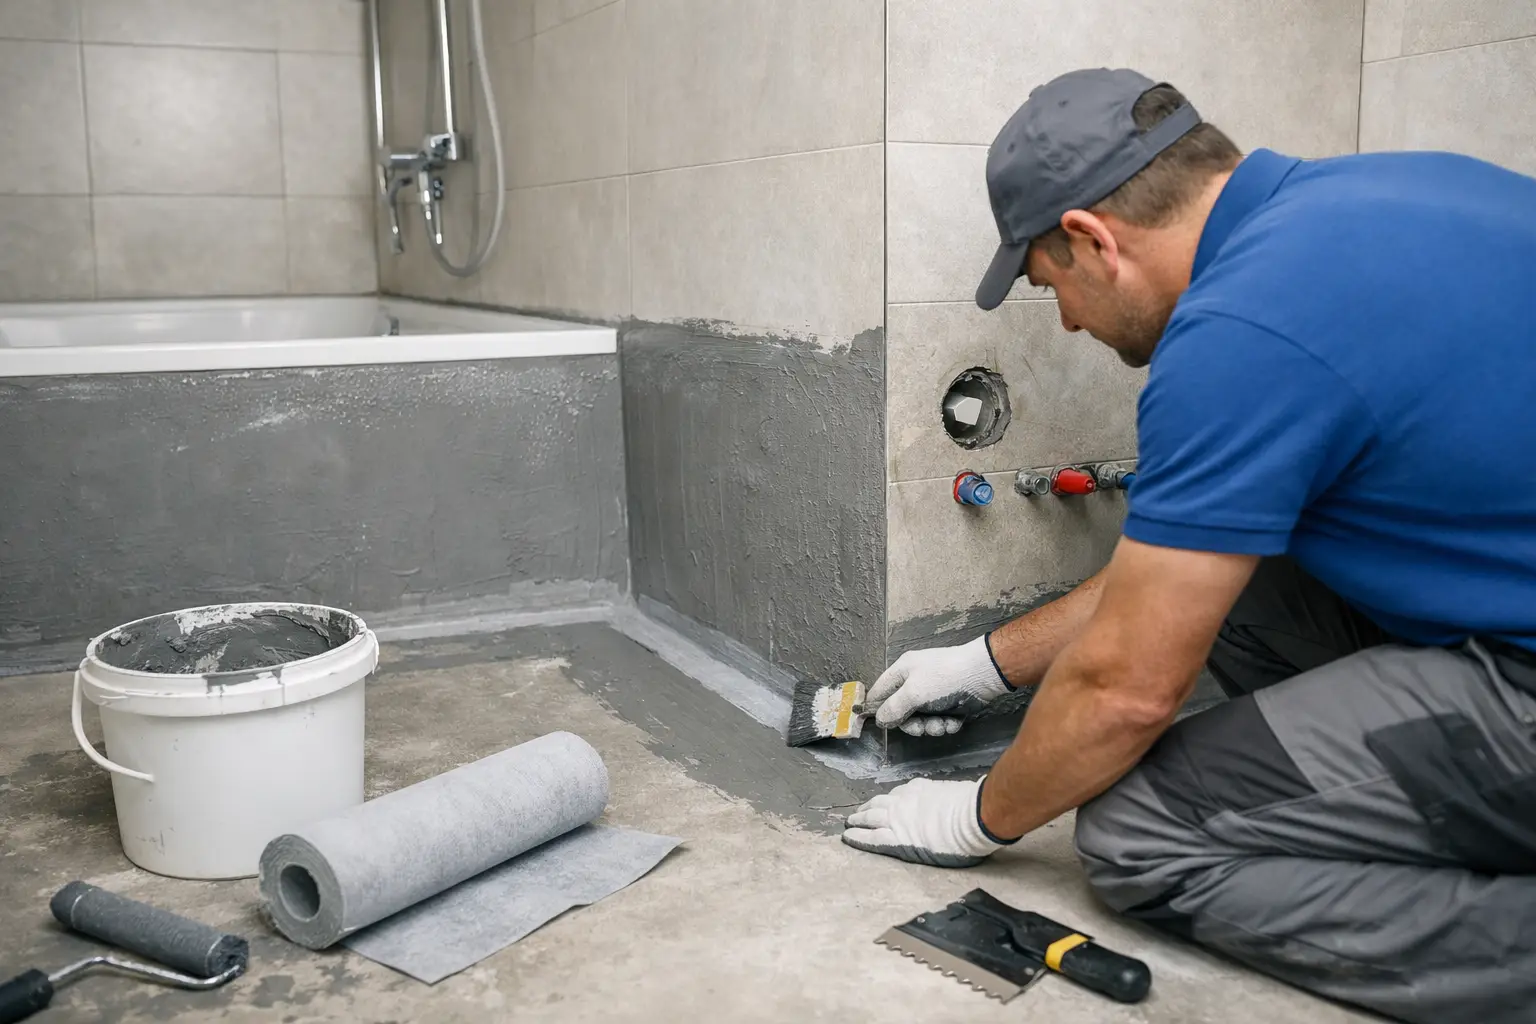
    Good waterproofing is one of the most important parts of any bathroom renovation, and it is one of the least visible once the room is finished. That is exactly why it matters. If waterproofing is rushed or done poorly, the damage often shows up later in swollen skirting, loose tiles, mould, leaks or hidden structural issues.

    Paying for certified waterproofing and proper preparation is not an optional extra. It is part of building the bathroom properly. Homeowners focused only on the lowest quote often do not realise that some pricing leaves out the quality steps that protect the room long term.

    Tile selection can shift the budget fast

    Tiles affect both material cost and labour cost. Standard ceramic tiles in a practical size are generally more budget-friendly to install than large-format tiles, natural stone or detailed patterns. The more cutting, edging and alignment work involved, the more time the tiler needs on site.

    Floor-to-ceiling wall tiling also adds cost compared with lower tile heights, although many clients still choose full-height tiling for a cleaner, more finished look and better moisture protection. It comes down to the result you want and where you want to invest.

    Fixtures and fittings can range widely

    A toilet is not just a toilet when pricing a renovation. The same goes for vanities, mixers, shower rails, basins, tapware and shower screens. Off-the-shelf fittings can keep the budget under control, while custom vanities, premium brands and designer finishes can push the total up quickly.

    That does not mean expensive always means better. Some mid-range products offer excellent durability and a strong finish without the markup attached to high-end labels. The key is choosing fittings that suit the bathroom, your budget and the level of use the room gets.

    Hidden repair work changes the job

    One of the most common reasons a bathroom renovation costs more than expected is hidden damage uncovered during demolition. Rot behind walls, water-damaged framing, uneven subfloors and non-compliant previous work are all common in older bathrooms.

    Until the old room is stripped out, some issues are impossible to confirm properly. That is why experienced renovators allow for the possibility of rectification work instead of pretending every bathroom is a clean slate.

    Budget, mid-range and higher-end bathrooms

    For a standard-sized bathroom, a basic full renovation with sensible fixture choices and minimal layout changes will usually sit at the lower end of the price range. A mid-range bathroom often includes better tile selections, improved fittings, a custom or semi-custom vanity and a more refined finish overall.

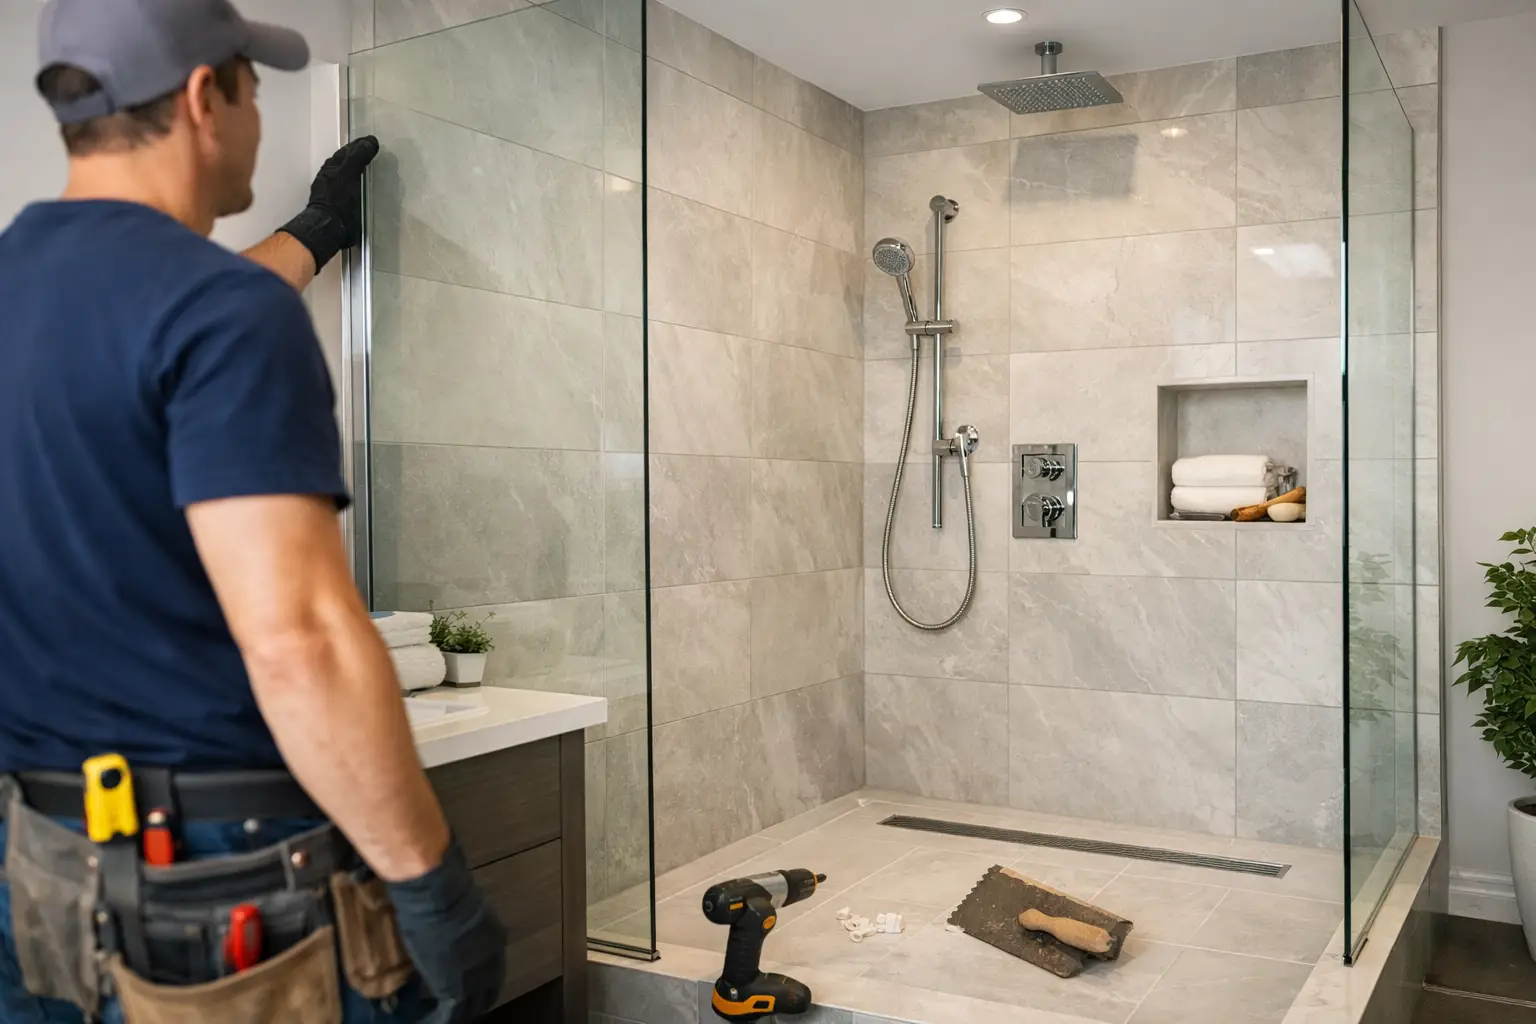
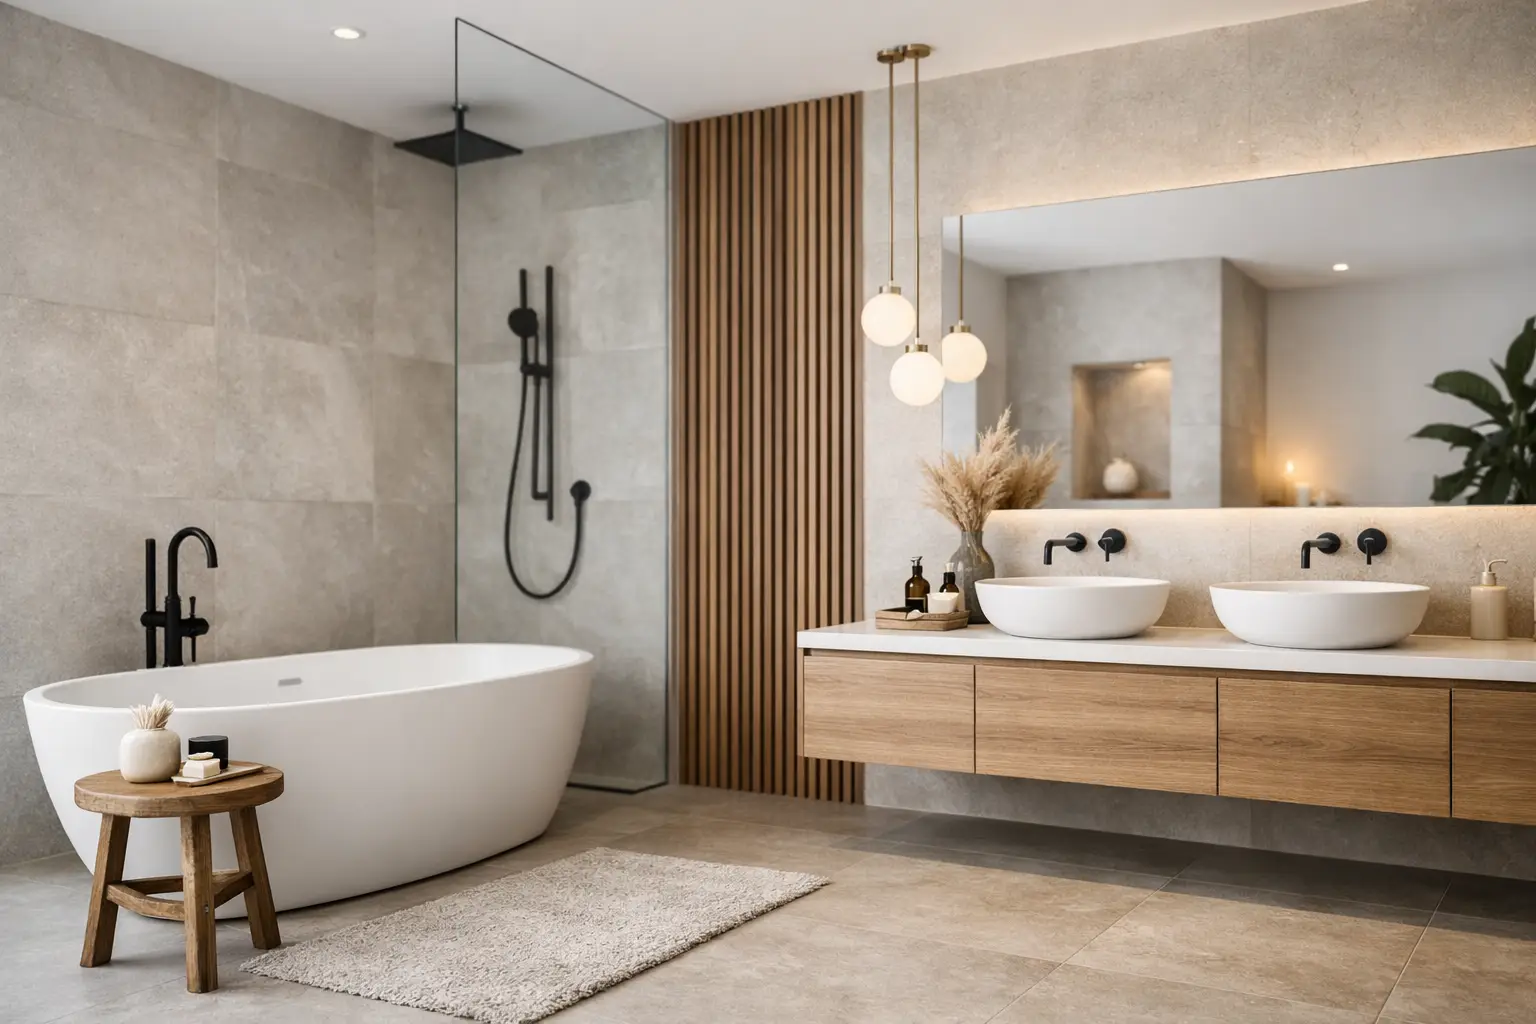
    Higher-end bathrooms tend to include more labour-intensive work such as walk-in showers with linear drains, frameless glass, feature tiling, custom storage, in-wall cisterns and upgraded lighting or joinery details. These rooms can look outstanding, but every upgrade adds time, coordination and cost.

    That is where honest advice matters. Not every bathroom needs premium finishes in every corner. In many homes, the best result comes from spending money on waterproofing, plumbing quality, tiling and durable fixtures, then being selective with visual upgrades.

    Why the cheapest quote often costs more later

    A bathroom is one of the most trade-heavy rooms in the house. It relies on proper sequencing and qualified workmanship. If demolition is rough, surfaces are not prepared properly, waterproofing is skipped or plumbing is poorly installed, the problems do not stay cosmetic for long.

    Low quotes are often low for a reason. Sometimes the scope is incomplete. Sometimes cheaper materials are assumed. Sometimes the labour allowance is unrealistic, which leads to rushed work or shortcuts on site.

    For homeowners in Melbourne’s western suburbs, this matters because many properties are family homes that need practical, durable upgrades rather than quick cosmetic cover-ups. A bathroom has to handle daily use, moisture, cleaning products and changing household needs. Good workmanship pays for itself in performance and fewer future repairs.

    How to compare quotes properly

    When comparing bathroom quotes, look beyond the total figure. Check what is actually included. Does the quote cover demolition and rubbish removal? Does it specify waterproofing, tiling extent, plumbing work, fixture installation and fit-off? Are PC items or supply allowances clearly explained?

    It also helps to ask who is doing the critical trade work. Bathrooms are not a room where you want guesswork around waterproofing or plumbing compliance. A well-priced quote from qualified trades is usually better value than a cheaper one that leaves gaps or uncertainty.

    A good quote should make the scope easier to understand, not harder. If it is vague, there is a risk the final cost becomes vague too.

    Ways to manage the cost without compromising the bathroom

    If you want to keep the budget under control, the first move is usually to keep the plumbing layout where it is. That alone can reduce labour and complexity. Choosing reliable mid-range fittings instead of premium designer products can also make a noticeable difference without lowering the quality of the finished room.

    Tile selection is another area where practical decisions help. A feature wall or niche can create interest without covering the whole room in expensive tiles. Standard-sized tiles also tend to be more efficient to install than intricate layouts or oversized formats that require more cutting and adjustment.

    What generally does not make sense is saving money on waterproofing, preparation or installation quality. Those are the parts of the job that protect the bathroom long after the new fittings have lost their showroom shine.

    Getting a realistic figure for your bathroom

    There is no single answer to complete bathroom remodel cost because every bathroom has different access, condition, selections and structural requirements. The useful question is what your specific bathroom needs to be done properly.

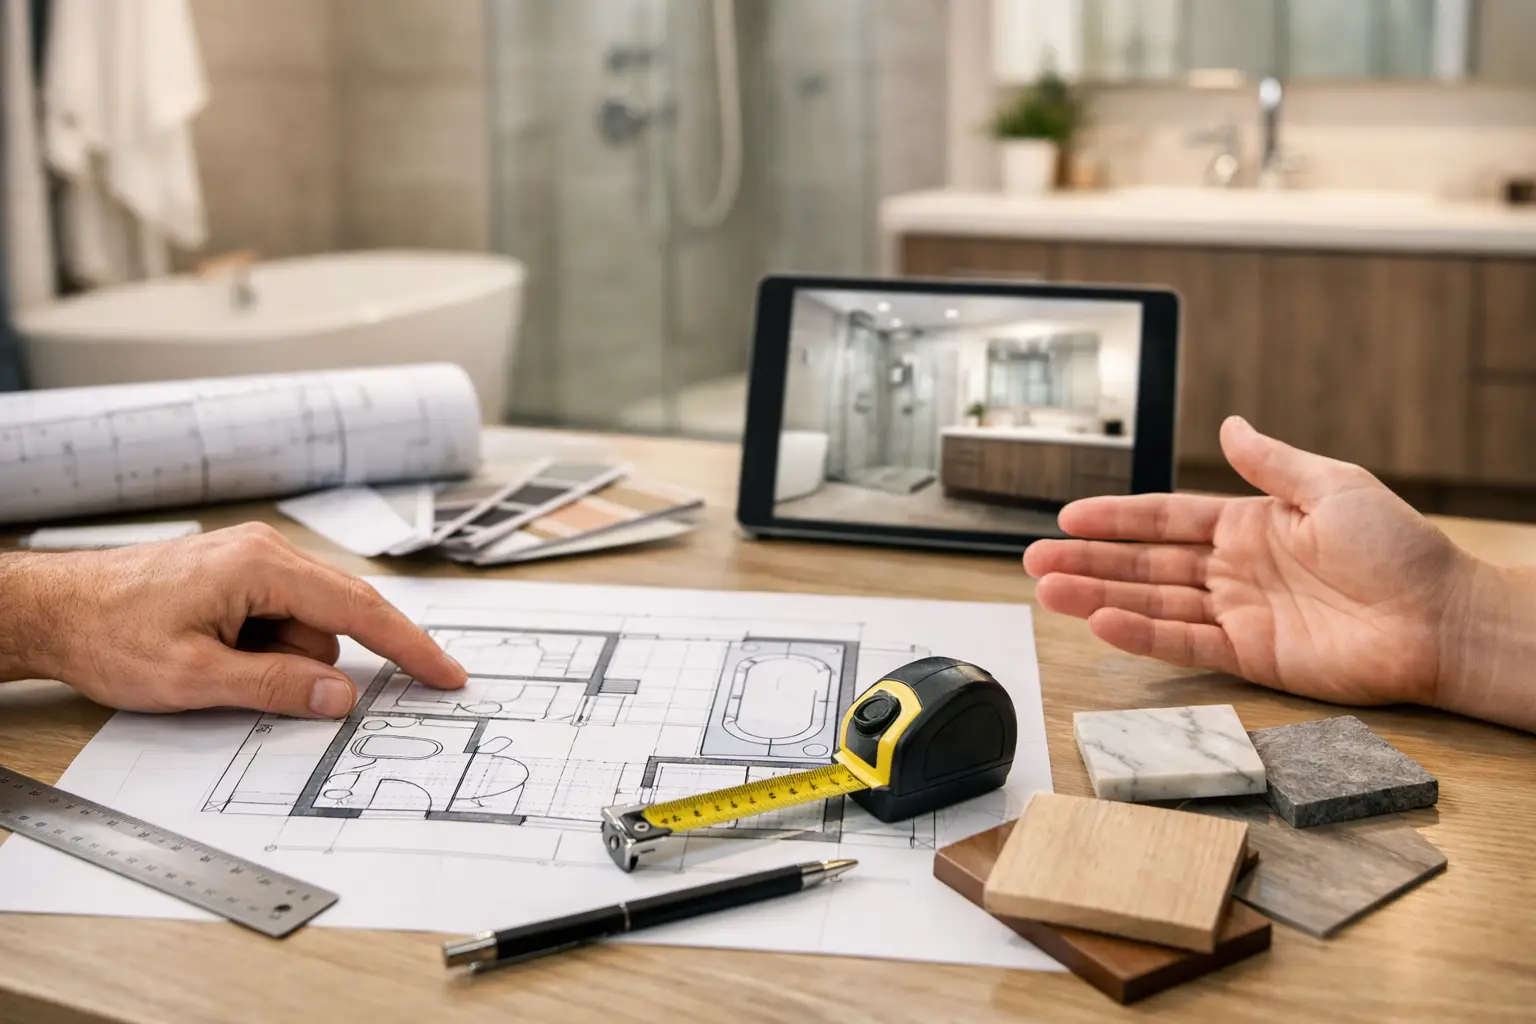
    That is where an on-site assessment matters. An experienced renovation team can look at the layout, check the room condition, talk through your priorities and explain what is driving the cost. In many cases, that conversation also helps identify where you can simplify the project and where spending a bit more is worthwhile.

    At BP Building & Maintenance, that practical approach matters because bathroom work is not just about appearance. It is about construction quality, waterproofing integrity and getting the job finished to a standard you can trust.

    A well-built bathroom is not the cheapest room in the house to renovate, and it should not be. But if the work is done properly, the value is felt every day – in how the room functions, how it lasts, and how little you have to worry about once it is finished.

  • How to Remove Wall and Floor Tiles Safely

    How to Remove Wall and Floor Tiles Safely

    The first tile always looks easy. It is the next twenty, plus the dust, the sharp edges, the adhesive left behind and the risk of damaging what sits underneath, that turns tile removal into a proper demolition job. If you are looking up how to remove wall and floor tiles, the real question is usually whether it is worth tackling yourself or whether it makes more sense to have it done properly as part of a bathroom renovation.

    In bathrooms, laundries and other wet areas, tile removal is not just about getting old finishes off the wall or floor. It can expose waterproofing, sheeting, screeds, plumbing penetrations and substrate damage that were hidden for years. That is why tile removal needs a bit more thought than simply grabbing a hammer and starting in the corner.

    How to remove wall and floor tiles without creating bigger problems

    The basic process sounds straightforward. Remove fittings if needed, protect surrounding areas, lift the first tile, then keep working across the surface while clearing away adhesive and rubble. In practice, the condition of the substrate matters more than the tile itself.

    Wall tiles are often fixed over plaster, cement sheet or villaboard. Floor tiles may sit over a screed bed or concrete slab. Some come off in large sections. Others shatter into small, sharp pieces and take chunks of backing with them. If the area is part of a bathroom, there is also the question of what happens to the waterproofing once the tiles are removed. In many cases, it will be compromised and need to be redone before any new tiling goes in.

    That is one of the biggest reasons homeowners call in a renovation team rather than treating tile removal as a weekend job. The strip-out is only one part of the work. What comes after matters more.

    What needs to be checked before any tiles come off

    Before removal starts, the area should be assessed properly. This is where experience saves time and expensive rework.

    The first check is what sits behind the tile. In an older bathroom, wall tiles may be bonded directly to plaster that will not survive demolition cleanly. In newer installations, the backing may be cement sheet, but even then, if the adhesive bond is strong, the sheet can tear or delaminate during removal. On floors, cracked tiles can point to movement underneath, while loose tiles may suggest a failing bed or moisture issue.

    The second check is services. Plumbing lines, wastes and fittings are often close to wall chases, shower areas and vanities. If you are removing tiles around a shower mixer, toilet or basin, one careless strike can damage pipework or fittings hidden behind the wall.

    The third check is asbestos risk in older homes. While the tiles themselves are not the issue, some backing materials, adhesives or wall linings in older wet areas may require specialist assessment. That is not something to guess your way through.

    Wall tile removal is usually messier than people expect

    Removing wall tiles tends to be more destructive than floor tile removal. Once the first tile is lifted, the rest often come away unevenly, taking adhesive and surface layers with them. In some bathrooms, the right approach is not to preserve the wall lining at all. It is faster, cleaner and more reliable to remove the tiled sheeting and reline the area properly.

    That matters in a full renovation because patching damaged walls can cost more in labour than a fresh start. It can also leave you with an uneven surface that causes problems when the new tiles are installed.

    Where tiled walls form part of a shower enclosure, the waterproofing is a major issue. Once demolition starts, you should assume the system will need to be replaced. There is no shortcut there if you want a bathroom that lasts.

    Floor tile removal can reveal the real condition of the room

    Floor tiles often hide more than wall tiles do. A bathroom floor may look tired but sound, or it may be covering cracked screed, poor falls, old patch repairs or water damage around the shower base and waste.

    Lifting floor tiles usually involves a jackhammer or demolition hammer with the right bit, especially where the bond is strong. The challenge is not just getting the tiles up. It is removing the adhesive cleanly enough to prepare for the next stage. If the substrate is uneven, contaminated or damaged, the new tile job will only be as good as the surface beneath it.

    In wet areas, correct falls to the waste are critical. If those falls were wrong to begin with, tile removal is the point where the issue becomes obvious. That is why experienced bathroom renovators treat demolition as an inspection stage, not just a strip-out.

    Safety matters more than speed

    Anyone asking how to remove wall and floor tiles should understand that this is not a low-risk job. Broken tiles are sharp, demolition creates airborne dust, and power tools in confined wet areas carry their own hazards.

    Proper PPE is the minimum. That means eye protection, gloves, a suitable dust mask or respirator, hearing protection and solid footwear. The room should be isolated as much as possible to stop dust travelling through the house. Fixtures, screens, vanities and nearby flooring need protection or removal before the demolition begins.

    There is also the manual handling side of it. Tile rubble gets heavy quickly. A small bathroom can generate a surprising amount of waste, and it all needs to be bagged, carried and disposed of properly.

    When tile removal makes sense as part of a full renovation

    If you are replacing tiles because they are dated, cracked or lifting, there is a fair chance the room needs more than a cosmetic update. Old bathrooms often have multiple issues happening at once – poor waterproofing, tired fittings, inefficient layout, water damage around the shower, or plumbing that no longer suits the way the room is used.

    In that situation, isolated tile removal can be false economy. Once the room is stripped back, it is often more practical to address the waterproofing, plumbing adjustments, shower base, vanity placement and retiling in one coordinated job.

    That is where a qualified renovation team adds value. Instead of treating demolition as a stand-alone task, they manage what follows: substrate repair, compliant waterproofing, plumbing and carpentry works, then accurate wall and floor tiling. It is a better way to protect the finish and the long-term performance of the room.

    Why bathrooms are different from other tiled areas

    Removing tiles in a kitchen splashback is one thing. Removing tiles in a shower recess or bathroom floor is another.

    Bathrooms are high-risk areas because water exposure is constant and failures are expensive. Once tiles are removed, every hidden weakness tends to show up. A swollen wall lining, loose sheeting, mould, cracked bedding or failed waterproofing membrane is not unusual. If any of that is left unaddressed, new tiles will not solve the actual problem.

    For homeowners in older parts of Melbourne’s western suburbs, this is especially relevant. Many bathrooms built years ago were finished to the standard of the time, not current expectations for waterproofing detail, drainage performance and durability. Demolition is often the point where those differences become very clear.

    The trade-off between saving money and getting it right

    There are cases where limited tile removal is manageable, particularly in a dry area or where the substrate is being replaced anyway. But in bathrooms and laundries, the trade-off is simple. You might save on upfront labour by doing the strip-out yourself, but if you damage pipework, framing, sheeting or surrounding finishes, the repair cost can wipe that out quickly.

    There is also the quality issue. Clean demolition makes the rest of the renovation easier. Rough demolition creates delays, extra prep work and uneven surfaces that need correction before anything can be rebuilt.

    A no-nonsense approach is to look at the whole project, not just the first step. If the room needs new waterproofing, retiling, plumbing changes or a new walk-in shower, proper demolition by the same team handling the renovation usually leads to a cleaner result and a faster turnaround.

    When to bring in a professional

    If the tiled area is inside a bathroom, shower, ensuite or laundry, professional removal is generally the safer call. The same applies if there are signs of water damage, cracked substrates, drummy tiles, plumbing changes or older construction materials.

    A qualified team can assess whether tiles should be removed individually, whether wall linings should come out with them, whether the floor bed needs replacement and what needs to happen next to keep the job compliant. That is the difference between a messy strip-out and a renovation that is built to last.

    For homeowners planning a bathroom upgrade, tile removal should be seen as the first construction stage, not a separate handyman task. Done properly, it clears the way for correct preparation, reliable waterproofing and a finish that will hold up over time.

    If your tiles are coming loose, the bathroom feels dated, or you suspect there is more going on beneath the surface, it is worth treating removal as an opportunity to fix the room properly rather than patching around the edges.

  • How to Seal Between Wall and Floor Tiles

    How to Seal Between Wall and Floor Tiles

    That line where the wall tile meets the floor tile is one of the first places a bathroom starts to show trouble. If you are wondering how to seal between wall and floor tiles, the short answer is this: it should usually be sealed with a quality sanitary silicone, not grout, and it needs to be done over a sound, dry, properly prepared joint. Get that detail wrong and you can end up with cracking, mould, water tracking and bigger waterproofing issues behind the surface.

    In a bathroom, that junction is a movement point. The walls and floor expand, contract and shift slightly over time, especially with daily heat, steam and moisture. Grout is rigid. Silicone is flexible. That is why a neat silicone joint at the wall-to-floor change matters more than many homeowners realise.

    Why the wall-to-floor joint needs the right seal

    The junction between wall and floor tiles is not just a cosmetic line. It is part of the bathroom’s defence against moisture getting where it should not. Even in a well-built bathroom, small movement is normal. If that joint is filled with grout, it often cracks. Once cracks appear, water and soap residue can work their way in, and that creates the kind of hidden damage that is expensive to repair.

    A proper flexible seal also makes cleaning easier. A smooth bead of mould-resistant silicone leaves fewer rough edges for grime to catch on. In showers and wet areas especially, that matters. If the seal is already split, lifting or black with mould, it is a sign the joint is no longer doing its job properly.

    How to seal between wall and floor tiles properly

    The method itself is straightforward, but the result depends on preparation. Rushing the clean-up or sealing over damp surfaces is where most jobs go wrong.

    Start by checking what is already in the joint

    If there is old silicone, it needs to come out fully before a new bead goes in. Sealing over the top rarely lasts. If the joint has been grouted and that grout is cracked, it should also be removed from the change-of-plane area. The goal is to get back to a clean joint so the new sealant can bond properly to both tiled surfaces.

    At this stage, it is worth looking closely for signs that the issue is more than just failed sealant. Loose tiles, drummy tiles, swelling skirtings outside the bathroom, persistent damp smells or recurring mould can point to a waterproofing or substrate problem underneath. In that case, replacing silicone alone is just dressing over the symptom.

    Clean and dry the joint thoroughly

    Any soap scum, dust, old residue or moisture will affect adhesion. The joint needs to be clean and fully dry before silicone is applied. That sounds simple, but in bathrooms it often means allowing enough drying time after cleaning, especially around showers that are used daily.

    This is also where product choice matters. For bathrooms, a sanitary-grade, mould-resistant silicone is the standard option. It needs to suit wet areas and tile applications. Cheap sealant often skins over quickly, tools poorly and does not hold up as well in a bathroom environment.

    Apply silicone, not grout, at the change of plane

    Where a wall meets a floor, the correct finish is generally a flexible silicone joint. That joint should be continuous, neatly tooled and sized to bridge the gap without excess bulk. Too little silicone and it can split. Too much and it looks rough, traps grime and can peel if not bonded properly.

    A clean application matters because this is one of the most visible details in a bathroom. Tape can help keep lines straight if a crisp finish is important, but the real key is steady application and proper tooling before the sealant skins.

    Let it cure before using the area

    This step gets ignored all the time. Silicone needs curing time, and using the shower too early can ruin the bond. The exact cure time varies by product and site conditions, but the point is the same: once the seal is applied, leave it alone long enough for it to set properly.

    Common problems when sealing tile joints

    The biggest mistake is using grout where silicone should be used. It may look neat on day one, but movement usually wins. Another common issue is sealing over contamination. If there is soap film, old silicone residue or moisture in the joint, the new bead may not adhere properly and can pull away.

    There is also the question of whether the gap itself is normal. A small, even junction is usually easy to seal. A wide, inconsistent or irregular gap may suggest poor tiling, substrate movement or previous repair work. Silicone can hide only so much. If the line is visibly uneven, the right fix may involve more than resealing.

    Colour matching is another practical detail. Many homeowners want the seal to blend with grout or tile colour, which is fair enough, but performance should come first. In wet areas, the right sanitary silicone in the right joint is more important than chasing a perfect visual match with the wrong product.

    When failed sealing points to a bigger bathroom issue

    Not every bad-looking joint means the bathroom needs replacing. Sometimes it is just aged silicone that has reached the end of its life. But sometimes the seal keeps failing because the surfaces underneath are moving or moisture is already getting past the tiled finish.

    If the same joint has been redone more than once and keeps separating, it is worth asking why. Bathrooms that were poorly waterproofed, incorrectly sheeted or badly tiled often show early movement and moisture issues around corners and floor junctions. The sealant is not the cause in those cases. It is simply the first thing to let go.

    This is where trade-qualified inspection matters. In a proper bathroom build, sealing is the final detail, not the thing holding the whole wet area together. Waterproofing integrity, falls to waste, stable substrates and correct tile installation all play a part in how well that wall-to-floor junction performs over time.

    How to tell if you need a professional repair

    If the silicone is discoloured, peeling or mouldy but the tiles are otherwise solid and the bathroom is dry, resealing may be all that is needed. If the tiles are loose, the grout nearby is cracking, or water is showing up outside the shower area, the problem may be underneath the surface.

    A lot of homeowners delay dealing with these signs because the joint itself looks minor. The trouble is that bathrooms do not usually fail all at once. They fail gradually, and the wall-to-floor line is one of the easiest places to spot it early.

    For older bathrooms, especially those that have had patch jobs over the years, it often makes sense to have the area assessed properly rather than keep replacing silicone and hoping for the best. In homes across Caroline Springs and Melbourne’s western suburbs, that approach usually saves money compared with chasing recurring leaks and cosmetic fixes.

    Why workmanship matters in wet areas

    Anyone can run a bead of silicone along a tile junction. Doing it neatly, over the right substrate, with the right wet-area product and the right understanding of what sits behind the tiles is a different story. Bathrooms are not forgiving when shortcuts are taken.

    That is why sealing details should be looked at as part of the overall quality of the wet area. If the joint is handled properly, it supports the performance of the bathroom. If it is treated like an afterthought, it can become the weak point that lets moisture, mould and damage get started.

    At BP Building & Maintenance, that practical approach matters because sealing is never just about making the edge look tidy. It is about whether the bathroom has been built and finished to last.

    If you have a bathroom joint that is cracking, lifting or constantly going mouldy, the best next step is not to ignore it. A small line between wall and floor tiles can tell you a lot about the condition of the bathroom behind it, and catching the problem early is always easier than repairing water damage later.

  • What to Tile First Wall or Floor?

    What to Tile First Wall or Floor?

    If you’re asking what to tile first wall or floor, you’re usually already thinking about the bigger issue – whether the job will look straight, drain properly and hold up over time. In a bathroom, the order matters because tiling is tied to waterproofing, set-out, fixture positions and how cleanly the whole room finishes.

    The short answer is this: in most bathroom renovations, we tile the walls first and the floor last. That approach helps protect the finished floor, keeps cuts cleaner around the perimeter and makes it easier to get a neat result. But like most trade work, there are exceptions, and the right sequence depends on the room, the tile type and the overall renovation plan.

    What to tile first wall or floor in a bathroom

    For a standard bathroom, wall tiling first is usually the better method. The wall tiles are installed while leaving the bottom row off if needed, then the floor is tiled, and finally the last row of wall tiles is cut in neatly to meet the floor. This allows for a tighter finish and helps hide any slight variation in floor levels.

    That matters more than many homeowners realise. Bathroom floors are rarely perfectly level, especially in older homes or where a shower falls to a waste. If the floor is tiled first and the walls are then started off that finished surface, any inconsistency in the floor can show up in the wall lines. By controlling the wall set-out first, a tiler has more room to keep everything visually straight.

    There is also a practical reason. A freshly tiled floor is easier to damage. Once floor tiles are down, every ladder, bucket, mixing tub and pair of boots becomes a risk. Even when protection is used, working over a finished floor adds another layer of care and clean-up.

    Why walls first is often the cleaner option

    In bathroom work, neat finishing is not just about appearance. It also affects how silicone joints, movement gaps and edge details perform over time. Tiling the walls first usually gives better control at the junction where wall meets floor.

    A common method is to support the first full course of wall tiles on a straight batten fixed above floor level. That lets the tiler establish a level line around the room, even if the subfloor or screed below has some fall. Once the wall tiles are set, the floor can be laid in with the correct falls, and the bottom row of wall tiles can then be cut to suit the finished floor height.

    This is especially useful in showers. The floor often needs a precise fall to the waste, and that means the perimeter may not sit at one perfectly even height all the way around. If the bottom wall tile course is left until the floor is complete, the cuts can be adjusted so the joint line stays tidy instead of forcing awkward gaps.

    For homeowners, the result is simple – the bathroom looks sharper, and the finished edges are less likely to draw attention for the wrong reasons.

    When floor first can make sense

    There are jobs where floor tiling first is the better call. A good tiler won’t follow one rule blindly if the room says otherwise.

    If the floor tile layout is the main visual feature, the whole room may be set out from the floor. This can happen with large-format tiles, feature floor patterns or rooms where symmetry matters around a centre line. In some cases, setting the floor first gives the installer the best reference for wall tile cuts and fixture alignment.

    It can also make sense when wall tiles are designed to sit directly on top of the floor tile for a particular finish detail. Some tile systems and design briefs call for that sequence. Laundry renovations and powder rooms can sometimes be less demanding than a full shower area as well, so the order may be chosen based on access and efficiency.

    That said, floor first needs proper protection and careful planning. If other trades are still moving through the space, the chance of chipping or marking the floor goes up quickly.

    The part most people don’t see – waterproofing and set-out

    The question of what to tile first wall or floor only makes sense after the prep is right. In a bathroom, tiling order sits behind more critical work such as substrate preparation, floor falls and compliant waterproofing.

    If waterproofing is poor, the order of the tiles won’t save the job. The membrane needs to be applied correctly to the required areas, allowed to cure properly and protected during the next stage. The floor and wall sequence must work with that system, not against it.

    Set-out is just as important. Good tiling starts well before the first tile goes on. A qualified installer will look at where the most visible lines land, how tile joints align with niches and tapware, where cuts fall in corners, and how the shower waste interacts with floor tile size. That’s why two bathrooms can use the same tiles and still end up with very different results.

    The order is not just a habit. It is part of how the whole room is planned for finish, durability and maintenance.

    Shower areas are their own case

    A shower is where the wall-or-floor question matters most. Unlike the main bathroom floor, the shower base often has multiple falls and tighter tolerances. Even a small error becomes obvious once water starts pooling where it shouldn’t.

    In many shower areas, the walls are tiled first, then the shower floor is laid after. That gives the tiler a chance to fine-tune cuts at the bottom edge and keep the perimeter line looking controlled. It also reduces the risk of damaging the finished shower floor while working above.

    Mosaic tiles, small-format floor tiles and formed screeds can all change the sequencing slightly, but the principle stays the same – the finished result needs to drain properly and look intentional. That’s the standard that matters.

    Why DIY advice often causes confusion

    A lot of online advice makes this sound like a simple either-or choice. It isn’t. Bathrooms are one of the more technical rooms in the house because tiling sits on top of plumbing, carpentry, waterproofing and substrate preparation. Each of those affects the next step.

    Someone might say floor first because that’s how they tiled a small ensuite once. Another might insist on walls first because that is standard on many renovation jobs. Both can be right in the right conditions. The problem is copying a method without checking the room, the falls, the tile type and the finish detail.

    In older homes across Melbourne’s western suburbs, for example, walls may not be plumb and floors may not be level. That changes how a professional approaches the set-out. A bathroom renovation is not just about getting tiles stuck on straight. It is about making sure the room performs properly once everything is in use.

    What homeowners should take from this

    If you’re renovating, the better question is not only what to tile first wall or floor. It is whether the installer has a clear plan for the whole sequence from strip-out to fit-off.

    You want to know that the floor falls have been considered before the first tile is cut. You want the waterproofing carried out correctly. You want tile joints to line up with the room, not fight against it. And you want the finished floor protected if other work is still to come.

    A reliable bathroom renovator should be able to explain why they are choosing one order over the other on your specific job. Not in vague terms, and not as a guess. The answer should relate to your layout, your tile selection and the way the bathroom is being built.

    At BP Building & Maintenance, that is how bathroom work should be handled – qualified trades, proper sequencing and no shortcuts where moisture and finish quality are involved.

    The right tiling order is the one that gives you a bathroom that looks clean on day one and still performs properly years later. If the plan behind the tiles is solid, the finish usually shows it.

  • How to Match Bathroom Wall and Floor Tiles

    How to Match Bathroom Wall and Floor Tiles

    Picking tiles for a bathroom sounds simple until you are staring at dozens of samples that all looked good in the showroom. This is where most people get stuck. If you are wondering how to match bathroom wall and floor tiles, the right answer is not to make everything identical. It is to make sure the tiles work together in scale, finish, colour and day-to-day practicality.

    A bathroom has to look good, but it also has to handle water, cleaning, slip risk and years of use. That is why tile selection should never be treated as a purely decorative choice. The best bathrooms get the balance right between appearance and performance.

    How to match bathroom wall and floor tiles without guessing

    The easiest way to get tile matching right is to start with the floor, not the wall. Floor tiles carry more technical weight because they need to be suitable for wet areas, feel safe underfoot and cope with regular use. Once the floor tile is locked in, wall tiles become easier to select because you are matching around a practical base rather than building a design from loose ideas.

    In most bathrooms, the floor should be the more grounded element. That might mean a soft grey porcelain, a warm stone-look tile or a textured neutral with some movement through it. The wall tile can then either lighten the room, add contrast or keep things calm and consistent.

    What usually works best is coordination rather than exact matching. A wall tile and floor tile do not need to be from the same range to look right together. They just need to share something in common – similar undertones, a related texture, or a finish that suits the same style of bathroom.

    Start with the overall feel you want

    Before choosing individual tiles, decide what the bathroom is meant to feel like. Clean and minimal? Warm and relaxed? Crisp and modern? That decision helps rule out combinations that clash even if each tile looks fine on its own.

    For a modern bathroom, larger format tiles in neutral shades often create a cleaner finish with fewer grout lines. If you want something softer and more natural, a stone-look floor tile with a simple matte wall tile usually gives a solid result. If the goal is to make a small bathroom feel brighter, lighter wall tiles can help bounce more light around the room while the floor adds some depth.

    This is where a lot of homeowners go off track. They pick a feature wall tile they love, then try to force the rest of the room to catch up. In practice, bathrooms usually come together better when the feature is the last layer, not the starting point.

    Match the undertones, not just the colour

    Two tiles can both be called white, beige or grey and still look wrong together. That is because the undertone is what actually drives whether a pair feels balanced. One grey might lean blue, another might lean brown. One white might be crisp and cool, another creamy and warm.

    When working out how to match bathroom wall and floor tiles, undertones matter more than the name on the sample. If your floor tile has a warm base, the wall tile should usually sit in the same family. Mixing warm and cool can work, but it needs a deliberate eye. More often, it just looks like two different jobs ended up in the same room.

    Natural light, artificial lighting and even the vanity colour will affect how undertones read. That is why tile samples should always be looked at together in the actual bathroom where possible. A showroom light can flatter a combination that feels flat or mismatched once installed at home.

    Use contrast carefully

    Contrast is useful, but too much of it can make a bathroom feel chopped up. A dark floor with a much lighter wall is a common choice because it anchors the space and keeps the room feeling open. That said, the contrast should still feel connected.

    If the floor tile is charcoal and the wall tile is bright white, the result can look sharp and contemporary, but only if the fittings, vanity and grout support that direction. If everything else in the room is soft and warm, that same contrast can feel harsh.

    Low-contrast schemes are often easier to live with. A mid-tone floor with a slightly lighter wall gives a more consistent look and tends to age better. It also makes small bathrooms feel less busy, which matters in many homes where the bathroom footprint is tight.

    Think about tile size and scale

    Tile size plays a bigger role than many people expect. You can match colours well and still end up with a bathroom that feels off because the scale is not doing the room any favours.

    Large format wall tiles can make a bathroom feel cleaner and more spacious because there are fewer grout joints. On the floor, larger tiles also work well in many bathrooms, but they need to suit the falls and drainage requirements, especially in shower areas. In some cases, smaller floor tiles or mosaics are the better option because they allow for proper water run-off and more grip underfoot.

    That means wall and floor tiles do not always need to match in size to match visually. In fact, they often should not. A common and practical approach is a larger wall tile with a smaller floor tile in a related tone. This gives the room variety without creating visual noise.

    Choose finishes for function first

    Gloss wall tiles can help reflect light and are easy to wipe down, so they remain a popular choice. Matte wall tiles have a softer, more contemporary look and can feel a bit less clinical. Both can work, depending on the style of the room.

    On the floor, safety matters more. A bathroom floor tile should have enough grip for a wet area. That often points to a matte or textured finish rather than a polished one. A polished floor tile might look sleek on a sample board, but in a real bathroom it can be impractical.

    This is a good example of where matching should not mean repeating the same finish everywhere. A matte floor tile paired with a gloss or satin wall tile often gives a better result than trying to keep everything identical.

    Don’t ignore grout colour

    Grout can either tie the tile scheme together or work against it. If you want a calm, uniform finish, choose grout close to the tile colour. If you want the tile shape or pattern to stand out, a contrasting grout will do that, but it also makes every line more visible.

    In bathrooms, grout also needs a practical mindset. Very light grout can show staining more easily, while very dark grout can highlight soap residue or mineral marks. Mid-tone grout is often the safest choice for long-term appearance.

    The grout on the wall and floor does not always have to be exactly the same, but it should look intentional. Random changes in grout colour can make even quality tiling look disconnected.

    Feature tiles work best in moderation

    Feature tiles have their place, especially in shower niches, splashback sections or a single wall. The problem starts when the feature tile fights with both the wall tile and the floor tile for attention.

    If you are using a patterned or textured feature, keep the main wall and floor tiles more restrained. The feature should support the room, not dominate every surface. In smaller bathrooms, less is usually more. A compact room can quickly feel crowded when there are too many finishes competing.

    A good feature tile often picks up a tone already present in the floor or wall tile. That one link helps the whole space feel thought through.

    Practical combinations that usually work

    Some tile pairings hold up well because they balance style and function. A stone-look floor tile with a plain white or off-white wall tile is reliable for a reason. It suits a wide range of vanities and fittings, and it does not date quickly.

    Warm beige or greige floor tiles with matching neutral wall tiles create a softer bathroom that feels less stark than all-white. For a more contemporary look, concrete-look floor tiles with simple rectified wall tiles can work well, especially when the joinery and fixtures are kept clean and uncluttered.

    What matters is not chasing trends too hard. Bathroom renovations are not something most homeowners want to redo in a few years because a fashionable combination already feels tired.

    Get the technical side right as well

    Tile selection should always sit alongside proper bathroom construction. Falls, waterproofing, substrate preparation and installation quality all affect the final result. A well-matched tile scheme will not save a bathroom from poor workmanship, and even premium tiles can look average if they are laid badly.

    That is why the matching process should consider where each tile is going, how it will be installed and how the room is used. In older homes across Melbourne’s western suburbs, for example, bathroom renovations often involve correcting uneven surfaces or outdated layouts before the tiling even starts. Those site conditions can influence what tile sizes and finishes are realistic.

    If you are planning a full renovation, it helps to choose tiles with the installer’s advice rather than treating tiling as the last cosmetic step. A qualified team can tell you early if a tile is suitable for shower floors, whether a format will work with the room size, and how the final layout will actually look once cuts, niches and fittings are accounted for.

    The right tile combination should feel settled the moment you walk in. Not forced, not overdesigned, and not built around a passing trend. If you are working out how to match bathroom wall and floor tiles, keep your focus on balance, practicality and finishes that will still look right years from now. That is usually what turns a bathroom from a collection of samples into a room that genuinely works.

  • Best Wall and Floor Tiles for Bathroom

    Best Wall and Floor Tiles for Bathroom

    A bathroom can look great on handover day and still be the wrong fit six months later. We see it often – glossy tiles that show every water spot, floor tiles that feel risky underfoot, or trendy choices that date quickly. Picking the best wall and floor tiles for bathroom renovations is not just about style. It is about safety, cleaning, durability and how the whole room performs over time.

    If you are renovating properly, tile selection needs to work with the layout, waterproofing, drainage and fixture choices. A good tile can lift the space. The wrong one can make a new bathroom feel harder to live with than the old one.

    What makes the best wall and floor tiles for bathroom projects?

    The best tile choice usually comes down to four things – water resistance, slip resistance, maintenance and visual balance. Bathrooms are wet areas, so surfaces need to handle moisture without creating extra cleaning or safety problems. That sounds simple, but there are trade-offs.

    For example, a highly polished tile may look sharp on a display board, but it can be slippery on the floor and show soap residue fast. A heavily textured tile can improve grip, but if the texture is too aggressive, it can trap grime and make mopping harder. The right answer depends on who uses the bathroom, how much natural light the room gets, and whether this is a family bathroom, ensuite or investment property.

    Best tile materials for bathroom walls and floors

    Porcelain is the standout choice for most bathrooms. It is dense, hard-wearing and performs well in wet areas. It suits both walls and floors, comes in a wide range of finishes and sizes, and gives you flexibility whether you want a clean modern look or something more natural. For busy households, porcelain is usually the safest all-round option.

    Ceramic also works well, especially on walls. It is often more budget-friendly and easier to cut, which can help when working around niches, windows or tighter details. On floors, though, ceramic is not always the first pick for high-traffic bathrooms. It depends on the tile rating and the intended use.

    Natural stone can look excellent, but it needs a more careful approach. Stone has character and warmth that manufactured tiles sometimes cannot match, but it also needs sealing and ongoing maintenance. In a bathroom used by a family every day, that extra upkeep is not always welcome. Stone can still be a strong choice in the right project, but it suits homeowners who are happy to maintain it properly.

    Wall tiles – what works best in practice

    Wall tiles give you more design freedom because slip resistance is not a factor. That is why many people go for smoother finishes, larger formats or decorative feature tiles on the walls.

    Large-format porcelain wall tiles are popular for good reason. They create a cleaner look with fewer grout lines, which usually means easier cleaning and a more spacious feel. In smaller bathrooms, that matters. A tight room can feel far less cluttered when the wall tile pattern is simple and the grout joints are reduced.

    Gloss tiles can help bounce light around, especially in bathrooms with limited natural light. That said, matte and satin finishes have become more common because they look softer and tend to hide marks better. If you want a bathroom that still looks tidy between cleans, a low-sheen wall tile is often the more practical option.

    Feature tiles are best used with restraint. A full room of strong pattern can close the space in. One feature wall, a shower recess, or a vanity splashback area usually gives enough interest without overworking the design.

    Popular wall tile styles that last

    Stone-look tiles, soft concrete-look finishes and simple white or off-white tiles tend to age well. They give you flexibility with tapware, vanity colours and fittings if tastes change later. Heavily trend-driven colours or busy prints can look good now, but they can also lock the whole room into one era.

    For resale, neutral tones are usually the safer move. That does not mean bland. Warm greys, soft beige, sand tones and muted whites can still look premium when the tile size, layout and trim details are done properly.

    Floor tiles – where function matters most

    Floor tile selection needs more discipline than wall tile selection. Safety comes first. In a wet bathroom, especially around showers and bath areas, the floor tile needs suitable grip without becoming a headache to clean.

    Porcelain floor tiles with a matte or lightly textured finish are usually the best choice. They give a good balance between slip resistance and maintenance. This is where many renovations go wrong – people choose based on showroom appearance rather than how the tile performs with wet feet and daily use.

    Smaller floor tiles can be useful in shower bases because they follow falls more easily and provide more grout lines for grip. Larger tiles can work on the main bathroom floor, but they need to suit the room size and drainage plan. This is not just a design decision. Tile size affects how well the floor can be laid to fall correctly, especially in showers.

    Slip resistance is not optional

    If you are comparing floor tiles, ask about slip ratings and where the tile is suitable to be installed. A bathroom floor that looks sleek but becomes slippery after the first shower is not a good result. This matters even more for family homes, older residents, and anyone planning to stay in the home long term.

    There is a balance here. Very rough tiles can improve grip, but some are harder to keep clean and less comfortable under bare feet. For most homes, a quality matte porcelain tile in the right rating is the practical middle ground.

    Tile size and layout can change the whole room

    The best wall and floor tiles for bathroom spaces are not only about material and finish. Size matters more than many homeowners expect.

    Large wall tiles can make a bathroom feel more open and reduce visual clutter. On floors, medium to large tiles often create a modern look, but oversized tiles are not always ideal in smaller bathrooms with multiple angles, niches or tight set-outs. More cuts can mean more waste and a busier finish if the layout is not planned well.

    Tile layout matters too. A straight lay suits most bathrooms and keeps the look clean. Stacked vertical wall tiles can make the ceiling feel higher. Subway tiles can still work, but they need careful handling. If the whole bathroom uses small-format tiles with contrasting grout, it can feel busy fast.

    Grout colour and maintenance matter more than people think

    Tiles get the attention, but grout has a huge effect on the final result. Bright white grout on bathroom floors rarely stays looking fresh without regular upkeep. Dark grout can hide dirt better, but if it is too dark against a light tile it can create a grid effect that dominates the room.

    A mid-tone grout is often the most practical choice. It softens the joints, hides everyday marks better and still keeps the room looking clean. This is especially useful in family bathrooms where function matters as much as presentation.

    Good tile work also depends on proper substrate preparation, waterproofing and installation. Even the best tile on the market will not save a bathroom if the wet-area work underneath is poor. That is why the tile choice should never be separated from the renovation method.

    Matching tiles to the type of bathroom

    An ensuite usually gives you more freedom to prioritise style because traffic is lighter and fewer people use it. A family bathroom needs tougher decisions. Floors need dependable grip, surfaces need to clean easily, and colours need to hide everyday wear.

    For investment properties, simple and durable usually wins. Neutral porcelain tiles, practical grout colours and a finish that stays looking tidy without too much effort will generally hold up better than high-maintenance feature choices.

    In many homes across Caroline Springs and Melbourne’s western suburbs, bathrooms are expected to do hard daily work. Kids, quick morning routines, steam, splashes and regular cleaning all put pressure on the finishes. That is why practical tile selection usually gives the best long-term result.

    What we usually recommend for a reliable finish

    For most full bathroom renovations, the safest combination is porcelain wall tiles in a smooth matte or satin finish, paired with slip-rated porcelain floor tiles in a matte or lightly textured finish. Keep the wall colour light to mid-tone, use a floor tile that grounds the room without making it feel dark, and avoid finishes that demand constant wiping.

    If you want a feature, use it in one area only. If you want a luxury look, get it through tile size, clean set-out, sharp mitres and quality fit-off rather than chasing the loudest pattern in the showroom. Well-executed simple choices often look more expensive than complicated ones.

    A good bathroom should still feel solid, safe and easy to maintain years after the renovation is complete. That is the real test. Not how the sample looked under bright showroom lights, but how the finished space works on a rushed weekday morning.

    The right tile choice is the one that suits your home, your household and the way the bathroom will actually be used. Get that right, and the room will not just look better – it will perform better every day.

  • Wall and Floor Tiling That Lasts

    Wall and Floor Tiling That Lasts

    A bathroom can look sharp on day one and still fail where it counts. That usually comes down to what sits behind the surface. With wall and floor tiling, the finish matters, but so do the falls, the substrate, the waterproofing and the setting out. If any of those are off, you can end up with cracked tiles, pooling water, mould issues or grout that starts breaking down far too early.

    That is why good tiling is not just about picking a tile you like. In wet areas, it is part of a bigger system that needs to be built properly from the ground up. For homeowners planning a bathroom renovation, understanding what quality looks like can save a lot of cost and frustration later.

    What quality wall and floor tiling actually involves

    A proper tiling job starts well before the first tile is laid. The surface underneath needs to be sound, level and prepared for the conditions in that room. In bathrooms and laundries, that also means waterproofing has to be completed correctly before tiling begins.

    This is where many problems start. Tiles and grout are not the waterproof barrier. They are the finished surface. If the substrate moves, the screed is uneven or the waterproofing is poor, the tiles will not hide it for long. A neat-looking job can still be a bad job.

    Wall tiling and floor tiling also have different demands. Walls need straight lines, clean cuts and consistent joints, especially around niches, tapware and corners. Floors need correct falls to waste, safe levels at transitions and a layout that works around drains and shower areas without creating awkward cuts or trip points.

    Why bathroom tiling is not just a cosmetic job

    In a bathroom, tiles do more than finish the room. They protect high-use surfaces, support easier cleaning and help the space handle constant moisture. But their performance depends on how the whole area is built.

    For example, floor tiling in a walk-in shower has to direct water efficiently to the waste. If the fall is too flat, water sits. If it is too steep or inconsistent, it feels poor underfoot and can create drainage issues in different corners. The best result is one you barely notice because it works exactly as it should.

    Wall tiling matters just as much. Crooked lines around a vanity or shower screen stand out immediately. More importantly, poor detailing around penetrations and edges can leave weak points in the wet area. In a full renovation, tiling needs to be coordinated with plumbing, waterproofing and fit-off, not treated as a separate trade working in isolation.

    The choices that affect the final result

    Tile selection has a direct impact on installation, maintenance and long-term performance. Larger format tiles can create a cleaner, more modern look with fewer grout lines, but they demand flatter surfaces and tighter preparation. If the walls or floors are out, large tiles can expose every issue.

    Smaller tiles can be more forgiving on curved or graded surfaces, which is why they are often used on shower floors. They allow the tiler to form falls more accurately around wastes. The trade-off is more grout joints, which can mean more cleaning over time.

    Then there is the finish. A polished tile may suit a wall, but it is not always ideal on a bathroom floor where slip resistance matters. A textured or matte finish often performs better in wet conditions, though it can require a different cleaning approach. There is no single right answer. It depends on how the bathroom is used, who uses it and how much maintenance you want to deal with.

    Layout and set-out are where workmanship shows

    You can spot a well-planned tiling job before you look at the grout. The tile layout feels balanced. Cuts are deliberate, not forced. Features line up. Niches, mixers, wastes and vanities sit comfortably within the pattern instead of looking like they were squeezed in afterwards.

    This is one of the biggest differences between rushed work and quality work. A proper set-out considers where the eye naturally goes when you enter the room. It aims to avoid tiny slivers at edges, awkward cuts around fixtures and uneven joints that make the whole bathroom feel off.

    In practical terms, this means the tiler should be thinking ahead. If a wall tile layout throws the floor out, or the waste ends up badly positioned in the pattern, the finished room suffers. It is not just about laying straight tiles. It is about making the whole space work visually and functionally.

    What can go wrong when corners are cut

    The most common tiling failures are not dramatic at first. They show up as hairline cracks, drummy tiles, stained grout, water sitting where it should not, or movement at junctions. Over time, those signs can point to bigger issues underneath.

    Sometimes the problem is poor preparation. Sometimes it is the wrong adhesive for the tile type or substrate. Sometimes it is movement in the structure that was not allowed for. And in wet areas, the biggest risk is often hidden water damage caused by failed waterproofing or bad detailing.

    That is why cheap tiling quotes can be misleading. If the scope leaves out proper substrate preparation, waterproofing coordination or rectification of existing issues, the price may look attractive at first but costly later. Replacing tiles is one thing. Rebuilding a failed bathroom is another.

    Why end-to-end bathroom work gets better results

    Tiling works best when it is part of a properly managed renovation, not patched into a disjointed process. Bathrooms involve multiple trades, and the handover between them matters. If demolition is rough, surfaces can be compromised. If plumbing rough-in is off, the tile layout can suffer. If waterproofing and tiling are not coordinated, the wet area is at risk.

    That is why many homeowners prefer one team to manage the entire bathroom renovation. It reduces delays, finger-pointing and mistakes between trades. It also means the finish is backed by people who understand the room as a complete build, not just one part of it.

    For homes across Caroline Springs and Melbourne’s western suburbs, that practical approach matters. Most people are not looking to manage a string of separate contractors while trying to keep the household running. They want the job done properly, with trades who know wet areas and understand what has to happen at each stage.

    How to judge a tiling job before you commit

    If you are speaking with a bathroom renovator, ask how the tiling stage is planned, not just what tiles they can install. A good operator should be able to explain substrate preparation, waterproofing, falls, waste placement and how they handle tricky areas such as niches, hobs, corners and transitions.

    It is also worth asking who is responsible for the wet area as a whole. The best outcomes usually come from qualified trades working in step, especially where plumbing, waterproofing and tiling need to align. That is one reason homeowners choose specialists with the right trade background rather than taking chances on whoever offers the cheapest square metre rate.

    You should also expect attention to the details that affect the final feel of the room. That includes straight lines, tidy silicone work, consistent grout joints, sensible tile set-out and clean finishing around fixtures. None of those details are minor. Together, they are what make a bathroom feel solid, finished and worth the investment.

    Wall and floor tiling should hold up to real use

    A bathroom is one of the hardest-working rooms in the house. It sees daily traffic, regular moisture, temperature changes and constant cleaning. The tiling has to cope with all of it, not just look good in photos.

    That is why durable wall and floor tiling comes back to workmanship every time. The right products matter, and so does the tile choice, but the long-term result depends on how the job is built. When the preparation is right, the waterproofing is done properly and the tiles are laid with care, the room not only looks better – it performs better.

    If you are renovating, it pays to think past the showroom sample. The tile is only one part of the result. What matters most is whether the bathroom has been built to last, with the kind of trade-qualified care that stands up years after the grout has cured.

    A good tiling job should not need excuses, touch-ups or constant watching. It should simply do its job every day, quietly and properly.

  • Who Does Complete Bathroom Remodeling?

    Who Does Complete Bathroom Remodeling?

    A bathroom reno usually looks simple until the walls come off. What seemed like a straightforward upgrade can quickly involve plumbing changes, waterproofing, tiling, carpentry, fixture installation and compliance work. That is why homeowners often ask who does complete bathroom remodelling, because the right answer is not just one tradie turning up with a toolbox.

    For a full bathroom renovation, the job is typically handled by a bathroom renovation specialist or building company that coordinates all required trades from start to finish. In practical terms, that means one team managing demolition, strip-out, plumbing, waterproofing, tiling, carpentry, shower construction, vanity installation and fit-off, instead of the homeowner trying to organise each step separately. If you want the work done properly, the key is not finding the cheapest person who can do part of it. It is finding the right qualified team that can deliver the whole job.

    Who does complete bathroom remodelling in practice?

    A complete bathroom remodelling is rarely a one-person job. Even when one business takes full responsibility, the work itself usually involves several qualified trades. Bathrooms are wet areas, and that brings extra technical demands around waterproofing, drainage, ventilation, substrate preparation and fixture installation.

    In most cases, a complete remodelling is delivered by a renovation company, builder, or bathroom specialist that either has in-house trades or manages trusted licensed subcontractors. The important part is not whether every trade sits under one payroll. The important part is who is accountable for the final result.

    If a company says it does full bathroom renovations, it should be able to handle the complete sequence of works. That includes demolition and removal, rough-in plumbing, carpentry or framing adjustments, waterproofing, wall and floor tiling, installation of toilets, vanities, tapware and screens, plus final fit-off. If structural changes or electrical works are needed, those should also be coordinated as part of the project.

    The trades involved in a full bathroom renovation

    Plumber

    A registered plumber is one of the most important trades in any bathroom renovation. If you are moving a shower, changing a toilet position, replacing old pipework or upgrading drainage, plumbing needs to be done correctly from the start. Poor plumbing can cause leaks, bad falls to waste, drainage issues and expensive rectification later.

    Waterproofer

    Waterproofing is where many bathroom projects go wrong. It is not the flashy part of the job, but it is one of the most critical. A certified waterproofer understands membrane systems, substrate preparation and the requirements for wet areas. If the waterproofing fails, tiles and fittings will not save the bathroom.

    Tiler

    A good tiler does far more than lay tiles neatly. Proper tiling depends on levels, set-out, falls, edges, junctions and waterproofing protection. In a walk-in shower especially, the quality of the tiling affects both appearance and drainage performance.

    Carpenter or bathroom builder

    Carpentry often comes into play when walls need straightening, framing needs adjustment, a new niche is being built, or a custom vanity or shower layout is part of the design. This trade also matters when older bathrooms have hidden damage or uneven surfaces that need correction before finishes go on.

    Electrician

    Not every bathroom reno needs major electrical work, but many involve new lighting, exhaust fans, heated towel rails or power point adjustments. This work must be completed by a licensed electrician.

    Why one point of contact matters

    When homeowners try to hire each trade separately, the biggest problem is not always workmanship. It is coordination. One delay throws off the next step. One trade blames another. Small issues get missed because no one is looking at the whole bathroom as a complete system.

    That is why a full-service bathroom renovation provider makes more sense for most homeowners. You get one scope, one timeline, one quote process and one point of accountability. If the plumbing needs to line up with the vanity, the waterproofing needs to suit the shower base, or the tiling needs to work around custom fittings, those details should be managed together.

    This is especially important in older homes across Melbourne’s western suburbs, where bathrooms can hide damaged sheeting, poor past renovations or water ingress. Once the strip-out starts, experience matters. A team that handles complete bathrooms regularly is far more likely to spot issues early and fix them properly.

    Who should manage the project?

    The short answer is this: the person or business taking on a complete bathroom renovation should have the right trade knowledge, the right licences and a clear process for managing the whole job.

    Some homeowners assume a general handyman can manage a bathroom renovation because there are lots of different small tasks involved. That is usually the wrong approach for a full wet-area renovation. Bathrooms are not just cosmetic spaces. They involve regulated and failure-prone work. Waterproofing and plumbing mistakes are expensive, disruptive and often hidden until damage appears.

    A proper bathroom renovation specialist is a better fit when the project involves full strip-out and replacement. That is because they understand the order of works, the technical standards and the practical details that affect the finished result. They also know where corners are commonly cut and how to avoid those shortcuts.

    What to look for before you hire anyone

    Trade qualifications and compliance

    Ask who is actually doing the plumbing and waterproofing. Those two areas carry the most risk, and they should not be vague add-ons in a quote. You want clear answers, proper qualifications and confidence that the work will be done to the required standard.

    Full-scope capability

    If you want a complete renovation, make sure the company can genuinely deliver one. Some businesses market themselves as bathroom renovators but mainly handle cosmetic updates. A true full-service provider should be able to take the job from demolition through to fit-off.

    Clear quoting

    A good quote should spell out what is included. Demolition, rubbish removal, waterproofing, plumbing works, tiling, fixtures, screens, vanities and final installation should not be left open to guesswork. Cheap quotes often get expensive once missing items are added back in.

    Experience with wet areas

    Bathrooms, laundries and ensuites all have similar technical demands. A team with regular wet-area experience tends to deliver better long-term results than a generalist who only does occasional renovation work.

    The trade-off between price and peace of mind

    Every homeowner has a budget, and that is fair enough. But with bathroom renovations, the lowest quote is not always the best value. If a cheaper price means rushed waterproofing, poor substrate prep, loose project management or lower-grade installation, the cost can come back later in repairs and frustration.

    That does not mean the most expensive option is automatically the best either. What matters is value for scope, quality and accountability. A solid bathroom renovation should feel durable, function properly and hold up to daily use. If you are replacing a bathroom, you want it done once and done right.

    Why local experience helps

    When a company regularly works in areas like Caroline Springs, Taylors Hill, Deer Park, Sunshine or Werribee, that local experience can be useful. It often means faster site visits, easier communication and a better understanding of the housing styles common in the area. Older bathrooms, investment property upgrades and family-home remodels all come with different priorities.

    A local operator also tends to rely more heavily on reputation. That matters in a trade where trust is everything. Homeowners want to know that if something needs attention, the business is accessible and stands behind its work.

    So, who does complete bathroom remodelling?

    The best answer is a qualified bathroom renovation specialist that can manage the full job, including all required trades, from demolition to final fit-off. Not a patchwork of separate contractors with no single responsibility. Not a handyman taking on work outside his lane. And not a quote that looks cheap because key parts of the job have been left out.

    For homeowners who want less hassle and a better result, the right choice is a team with proven wet-area experience, proper trade qualifications and a practical process for delivering the entire bathroom. That is the difference between a renovation that only looks good on handover day and one that still performs properly years later.

    If you are planning a bathroom upgrade, ask a simple question before you start: who is taking responsibility for the whole job? Once you have a clear answer to that, the rest of the renovation tends to run a lot smoother.

  • What Is a Full Bathroom Renovation?

    What Is a Full Bathroom Renovation?

    If you have to ask what is a full bathroom renovation, chances are your current bathroom is well past a simple update. Maybe the tiles are dated, the shower leaks, the layout wastes space, or the whole room just feels tired. A full renovation is the point where patch-up work stops making sense and the bathroom gets rebuilt properly from the ground up.

    For most homeowners, that means more than swapping a vanity or replacing tapware. It means stripping the room back, fixing what sits underneath, and rebuilding it so it works better, lasts longer, and meets current standards. If you want a bathroom that looks good but also performs properly day after day, this is the level of work that matters.

    What is a full bathroom renovation in practical terms?

    A full bathroom renovation is a complete rebuild of the bathroom space. The existing fittings, finishes and often the wall and floor linings are removed so the room can be reworked from the base structure up. That usually includes demolition, plumbing changes where needed, waterproofing, tiling, fixture installation and fit-off.

    In plain terms, the old bathroom is stripped out and a new one is built in its place. Depending on the condition of the room and the new design, this can also include structural carpentry, new lighting, ventilation improvements, custom joinery and a walk-in shower conversion.

    That is very different from a cosmetic refresh. A refresh might involve painting, replacing a mirror, updating a screen or installing a new vanity in the same spot. A full renovation goes further because it addresses the parts you cannot afford to ignore, especially in a wet area.

    What is included in a full bathroom renovation?

    The exact scope depends on the bathroom, but a true full renovation usually starts with demolition and strip-out. Old tiles, shower screens, vanities, baths, toilets and wall linings are removed so the room can be assessed properly. Once everything is opened up, it is much easier to spot hidden water damage, poor previous workmanship or framing issues.

    From there, plumbing and drainage are checked and altered if the layout is changing. If you are moving a shower, toilet or vanity, the rough-in work needs to be done before the room is closed up again. Electrical work may also be required for lighting, exhaust fans, heated towel rails or power points.

    Then comes one of the most important stages – waterproofing. This is not the glamorous part, but it is the part that protects the rest of the job. Good waterproofing helps prevent leaks, structural damage, mould and expensive repairs later. In many older bathrooms, failed waterproofing is the real reason a renovation becomes necessary in the first place.

    After waterproofing, the room is prepared for wall and floor tiling. Once the tiles are laid and cured, the bathroom moves into fit-off. That is where the toilet, vanity, shower screen, tapware, mirrors, bath and accessories are installed. If the job includes a custom vanity, recessed niche, feature tiling or a walk-in shower, those details are also finished during this stage.

    A proper full renovation finishes with silicone sealing, testing, clean-up and final checks. That matters because a bathroom can look complete before it is actually complete.

    Why homeowners choose a full renovation instead of smaller upgrades

    The biggest reason is that surface-level changes do not fix underlying problems. New tapware will not solve poor drainage. Fresh tiles will not help if the substrate underneath has water damage. A new shower screen will not correct a shower base that was built incorrectly.

    A full renovation makes sense when the bathroom has multiple issues at once. You might be dealing with cracked tiles, outdated plumbing, poor storage, mould, a cramped shower or a layout that does not suit your household anymore. In that situation, trying to repair each issue separately often costs more over time and still leaves you with a compromised bathroom.

    It also comes down to confidence in the result. If you are investing in your home, you want to know the bathroom has been built by qualified trades and that the waterproofing, plumbing and carpentry have been handled correctly. That is especially important in family homes and established properties where long-term durability matters more than a quick visual upgrade.

    A full bathroom renovation is not just about looks

    A better-looking bathroom is part of the outcome, but it should not be the only goal. The real value is in how the space functions and how well it holds up.

    A well-planned renovation can make a small bathroom feel more open, improve access, create better storage and make cleaning easier. Swapping a bulky shower base for a walk-in shower can improve movement and modernise the room at the same time. A custom vanity can give you practical storage where a standard unit cannot. Better ventilation can reduce moisture build-up and help protect paint, grout and cabinetry.

    There is also a compliance side to bathroom work that many homeowners do not see until something goes wrong. Wet areas need the right preparation, the right products and the right installation sequence. Shortcuts in these areas can lead to leaks into adjoining rooms, damaged flooring and costly rectification work. That is why trade-qualified execution matters.

    How long does a full bathroom renovation take?

    This depends on the size of the bathroom, the complexity of the design and whether any hidden issues are uncovered during demolition. As a general guide, a standard full bathroom renovation often takes a couple of weeks from strip-out to completion, but some jobs run longer if custom materials are involved or the layout changes significantly.

    The timeline is influenced by more than labour alone. Waterproofing and tiling need proper curing time. Custom vanities and shower screens may need to be measured and manufactured. If the bathroom is in an older home, there can be surprises once the room is opened up.

    Fast turnaround is valuable, but it should not come at the expense of workmanship. A bathroom is one area where rushing the wet trades can create expensive problems later.

    What affects the cost?

    When people ask what is a full bathroom renovation, cost is usually the next question. The honest answer is that it depends on the size of the room, the amount of preparation required, the fixtures you select and whether the layout is staying the same.

    Keeping plumbing in the existing positions can help control costs. Moving the toilet or shower usually adds labour and materials. Tile choice also has an impact, especially if you choose large-format tiles, full-height tiling or detailed feature work. Custom joinery, frameless shower screens and premium tapware will increase the spend as well.

    The condition of the existing bathroom matters too. If the strip-out reveals rotten framing, damaged sheeting or failed previous waterproofing, that needs to be fixed before the new bathroom goes in. It can add to the budget, but it is still better to deal with it properly than cover it up.

    What should you expect from the renovation process?

    You should expect a clear scope of work, realistic advice and proper trade coordination. A full bathroom renovation is one of those jobs where sequencing matters. Demolition has to be done cleanly. Plumbing and carpentry need to happen before waterproofing. Waterproofing must be complete before tiling starts. Fit-off comes after that.

    You should also expect honest discussion about what is possible in your space. Not every design idea suits every bathroom. In some rooms, a freestanding bath looks great in photos but makes the space harder to use. In others, removing a bath in favour of a larger shower is the more practical choice. Good advice is not about selling the biggest job. It is about building the right bathroom for how you live.

    For homeowners across Caroline Springs and Melbourne’s western suburbs, that often means balancing style with durability. A bathroom has to stand up to daily use, moisture and cleaning. It needs to be easy to maintain and built by people who understand the technical side, not just the visual side.

    Is a full bathroom renovation worth it?

    If your bathroom has reached the point where multiple elements are failing, yes, it often is. A full renovation gives you the chance to fix hidden issues, improve function and avoid ongoing repair costs. It also gives you a bathroom that feels current, comfortable and built to last.

    That does not mean every bathroom needs a full strip-out. If the room is structurally sound and the waterproofing is intact, a smaller update may be enough. But if there are signs of leaks, ageing finishes, poor layout or workmanship concerns, doing the job once and doing it properly is usually the better path.

    A bathroom is one of the hardest-working rooms in the house. When it is built well, you notice it every day in the best way – everything works, nothing feels compromised, and you are not worrying about what is happening behind the tiles.

    If you are weighing up whether your bathroom needs minor work or a complete rebuild, start by looking past the surface. The smartest renovation decisions are usually made there.

  • How Long Do Bathroom Renovations Take?

    How Long Do Bathroom Renovations Take?

    If you are planning a bathroom upgrade, one of the first questions is usually how long do bathroom renovations take. Fair question. Once the old bathroom is out of action, every extra day matters, especially in a family home where one bathroom suddenly has to do the work of two.

    The short answer is that a standard bathroom renovation usually takes around 2 to 4 weeks on site. That said, the real answer depends on the scope of works, the condition of the existing room, how much plumbing or structural work is involved, and whether materials are ready to go before the job starts. A simple replacement of fixtures and finishes will move faster than a full strip-out with layout changes, custom joinery and walk-in shower construction.

    How long do bathroom renovations take on average?

    For most full bathroom renovations, allow roughly 10 to 20 working days once work begins on site. Smaller bathrooms with a straightforward layout can sometimes be completed faster. Larger bathrooms, older homes, or projects with more complex waterproofing, carpentry or plumbing alterations can take longer.

    What often catches homeowners out is that the site work is only part of the timeline. Before demolition starts, there is usually a planning and quoting stage, product selection, ordering, and scheduling of trades. If tiles, tapware, vanities or shower screens are delayed, the overall project can stretch even if the actual labour runs efficiently.

    A reliable renovation timeline is not just about working quickly. It is about sequencing the job properly so each trade can do its part without cutting corners. In bathrooms, that matters most with waterproofing, plumbing and fit-off. Rushing those stages is where expensive problems start.

    A realistic bathroom renovation timeline

    Every job is different, but most bathroom renovations follow a fairly consistent order.

    Day 1 to 2: Demolition and strip-out

    The old bathroom is removed, including tiles, fixtures, cabinetry and, where required, wall linings or flooring. This stage can move quickly in a modern home with good access. It can slow down if there is hidden water damage, outdated plumbing, asbestos concerns, or walls and floors that are not square.

    Day 2 to 5: Rough-in work and preparation

    Once the room is stripped back, the underlying work begins. This can include plumbing rough-in, electrical rough-in, carpentry, wall straightening, floor preparation and substrate installation. If you are changing the layout, moving wastes, or converting a bath to a walk-in shower, this stage usually takes longer.

    This is also where good trades make a difference. A bathroom might look simple when finished, but the important work is often hidden behind the walls and under the tiles.

    Day 5 to 7: Waterproofing

    Waterproofing is not the stage to rush. Surfaces need to be prepared properly, the membrane needs to be applied correctly, and cure times need to be respected. Depending on the system used and site conditions, waterproofing can take a couple of days including drying time.

    This is one of the main reasons bathroom timelines are not as simple as just counting labour hours. Some stages need time to set, dry or cure before the next trade can move in.

    Day 7 to 12: Tiling

    Wall and floor tiling can take several days depending on the size of the bathroom, the tile format, the pattern, niche work, feature walls and whether the floor needs falls set carefully to a shower waste. Large-format tiles can save time in some cases, but they also require precision. Smaller feature tiles or detailed layouts can add labour.

    After installation, grout also needs time before the room is ready for final fit-off.

    Day 12 to 15: Fit-off and installation

    This is when the bathroom starts to look finished. Fixtures, tapware, vanities, mirrors, toilets, shower fittings and accessories are installed. If there is a custom shower screen, timing can vary depending on whether it was measured earlier and whether manufacturing is already complete.

    Final days: Testing, finishing and clean-up

    The final stage includes sealing, painting if required, testing fixtures, checking drainage, and making sure the room is ready for use. A professional handover should leave the bathroom complete, clean and functioning properly, not mostly finished with loose ends still hanging around.

    What can make a bathroom renovation take longer?

    The biggest delays usually come down to scope, site conditions and product availability.

    Layout changes are a common factor. If the toilet, vanity or shower is being moved, plumbing becomes more involved. In some homes, especially older properties, the existing pipework or floor structure can complicate what looked straightforward on paper.

    Tile choice also matters. Standard tiles with a simple stacked layout are quicker than intricate patterns, herringbone designs, mosaics or heavily cut natural stone. The same goes for custom vanities, recessed shaving cabinets and built-in niches. They can look excellent, but they add coordination and labour.

    Then there are the hidden issues. Water damage behind tiles, rotten framing, uneven floors, poor past workmanship and non-compliant waterproofing are all things that can show up after demolition. No experienced renovator will promise an exact finish date before the room is opened up, because sometimes the real condition of the bathroom is not visible until the old materials are removed.

    Material delays can be just as disruptive. If one key item has not arrived, such as a vanity, shower screen or tapware set, the whole sequence can stall. That is why proper planning before the start date makes such a difference.

    Can a bathroom renovation be finished in one week?

    Sometimes, but not often for a full renovation done properly.

    A very small bathroom with a like-for-like replacement, no structural changes and all materials on hand might be turned around quickly by an organised team. But when people hear one-week bathroom renovation, it is worth asking what is actually included, and whether waterproofing, curing times and final checks are being handled correctly.

    Fast turnaround is a good thing when it comes from proper coordination and experienced trades. It is not a good thing when it comes from skipping steps that protect the room from leaks and movement later on. Bathrooms are wet areas. A neat finish means very little if the waterproofing underneath is compromised.

    How to keep your renovation on schedule

    If you want the job to run smoothly, most of the time savings happen before the first tile is removed.

    Choose your fixtures, tiles and fittings early. Make sure everything is ordered and confirmed before the start date. If you are deciding between products mid-job, the schedule can quickly drift.

    Be clear on the scope from the start. If you begin with a basic renovation and then add a custom niche, underfloor heating, a larger shower or layout changes halfway through, timeframes usually blow out.

    It also helps to work with a team that can manage the full process. Bathrooms involve multiple trades, and delays often happen in the handover between them. When demolition, plumbing, waterproofing, carpentry, tiling and fit-off are properly coordinated, the project generally moves faster and with fewer mistakes.

    For homeowners in Caroline Springs and Melbourne’s western suburbs, that trade coordination is often the difference between a bathroom that drags on for weeks and one that stays on track.

    The answer depends on the type of renovation

    A cosmetic update is not the same as a full rebuild. If you are replacing a vanity, updating tapware, installing a new shower screen and freshening finishes without changing the bones of the room, the timeframe will be shorter.

    A complete renovation is more involved. Full demolition, new waterproofing, retiling, plumbing changes, custom joinery and shower construction take time because the work has to be done in the right order. If the job includes laundry integration, accessibility upgrades or structural changes, expect a longer schedule.

    That is why the best answer to how long do bathroom renovations take is this: most standard bathrooms take 2 to 4 weeks on site, but the exact timeframe depends on what is being changed and what is uncovered along the way.

    A good renovator will give you a realistic timeframe, not just the answer you want to hear. That honesty matters, because a bathroom renovation is not just about finishing fast. It is about finishing properly, so the room looks right, functions well and holds up for years after the trades have packed up.